


This article is the first part for an Active-passive High Availability Solution for Oracle Database without Data Guard solution.
This first part explains how to set up an Oracle database duplication/clonage.
Table of Contents:
– Introduction
– Description of the environments
– Prerequisites
– Set up an Oracle Database duplication
1. Introduction:
Recovery Manager (RMAN) is an Oracle Database client that performs backup and recovery tasks on your databases and automates administration of your backup strategies. It greatly simplifies backing up, restoring, and recovering database files. For more information.
RMAN has the ability to duplicate, or clone, an Oracle database from a backup or from an active database. It is possible to create a duplicate database on a remote server with the same or different file structure.
2. Description of the environments:
This table describes the environments of the Oracle Database server source and destination:
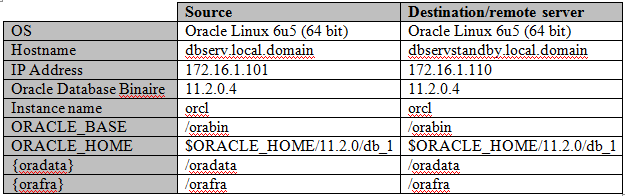
- Configuration of the file /etc/hosts on both Oracle Linux Server:
172.16.1.101    dbserv.local.domain     dbserv
172.16.1.110    dbservstandby.local.domain      dbservstandby
– On Source Oracle Linux

– On Remote Oracle Linux

3. Set up an Oracle Database duplication:
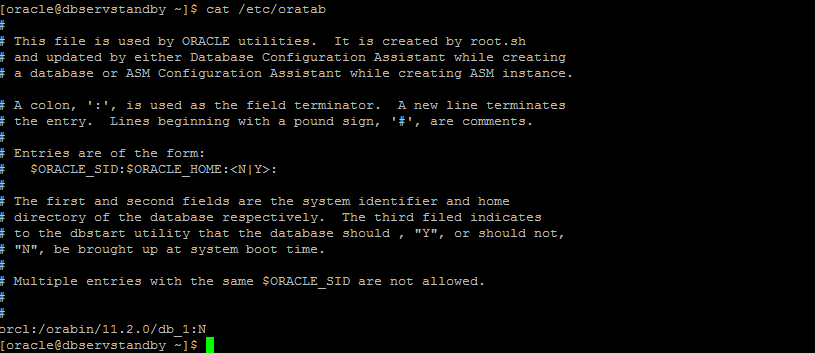
Step 1: Configure the file /etc/oratab on the remote server:
$ cat /etc/oratab
Step 2: Verify that the archive log is enabled on the Oracle database Source.
SQL> archive log list;

Step 3: Copy the pfile from source to destination:
Create a PFILE for the duplicate database. Since we are duplicating the database with the same filesystem as the original, we don’t need to convert the file names. In this case, the PFILE is called “initorcl.ora” and is placed in the “$ORACLE_HOME/dbs” directory on the remote server.
- Create a pfile
SQL> create pfile='/tmp/initorcl.ora' from spfile;

- Copy the pfile on the remote server
$ scp /tmp/initorcl.ora 172.16.1.110:/orabin/11.2.0/db_1/dbs/
![]()
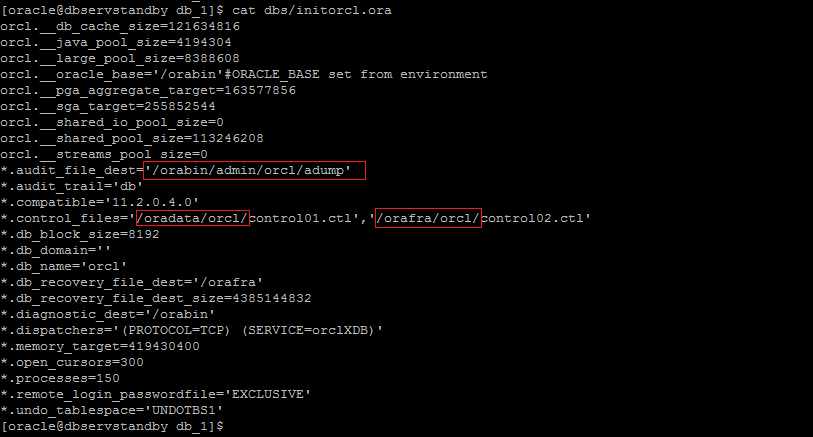
- Verify the initorcl.ora file on the remote server:

Step 4: Create the password file on the remote Server. (On my case password=oracle)
$ orapwd file=/orabin/11.2.0/db_1/dbs/orapworcl password=oracle entries=10

Step 5: Create a static Listener configure on the remote Oracle Linux Server.
- Copy the listener file from the source to the remote server.
$ scp /orabin/11.2.0/db_1/network/admin/listener.ora dbservstandby:/orabin/11.2.0/db_1/network/admin/listener.ora

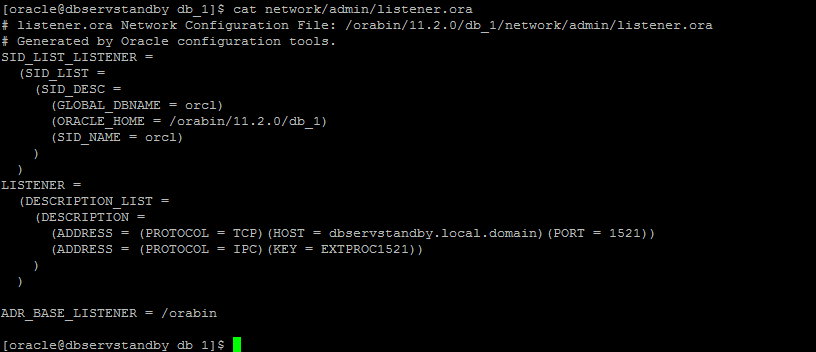
- Modify the configuration of the file listener.ora:
$ cat network/admin/listener.ora
# listener.ora Network Configuration File: /orabin/11.2.0/db_1/network/admin/listener.ora
# Generated by Oracle configuration tools.
SID_LIST_LISTENER =
  (SID_LIST =
    (SID_DESC =
      (GLOBAL_DBNAME = orcl)
      (ORACLE_HOME = /orabin/11.2.0/db_1)
      (SID_NAME = orcl)
    )
  )
LISTENER =
  (DESCRIPTION_LIST =
    (DESCRIPTION =
      (ADDRESS = (PROTOCOL = TCP)(HOST = dbservstandby.local.domain
)(PORT = 1521))
      (ADDRESS = (PROTOCOL = IPC)(KEY = EXTPROC1521))
    )
  ) ADR_BASE_LISTENER = /orabin
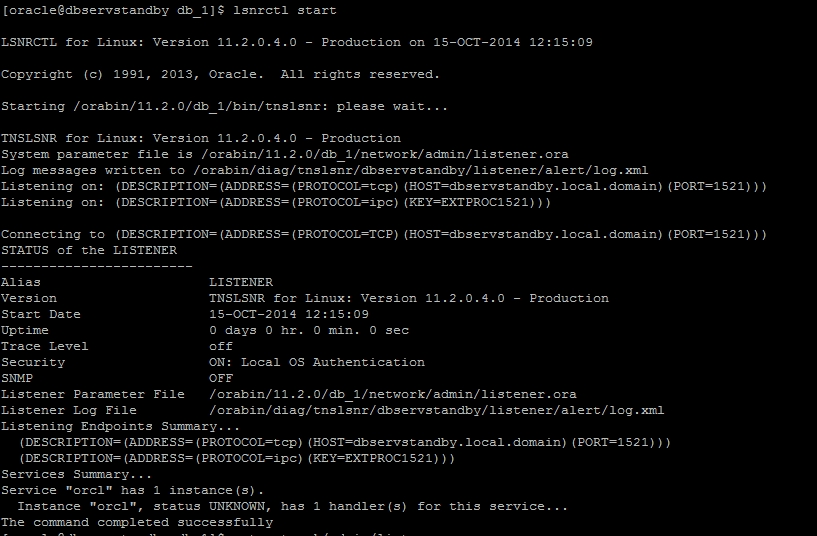
- Start the listener
$ lsnrctl start
Step 6: Startup no mount the Oracle Database on the remote server:
- Create the absent directory:
$ mkdir -p /orabin/admin/orcl/adump
$ mkdir -p /oradata/orcl
$ mkdir -p /orafra/orcl
Note: I Create this directory because it contains the online log file:
$ mkdir -p /orafra/ORCL/onlinelog

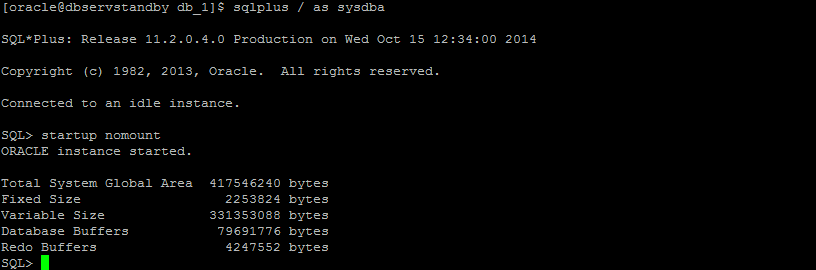
- Startup no mount:
$ sqlplus / as sysdba
SQL> startup nomount
Step 7: Backup database plus archive log on the source Oracle Linux Server.
- Connect to target (Oracle Database source)
$ rman target /
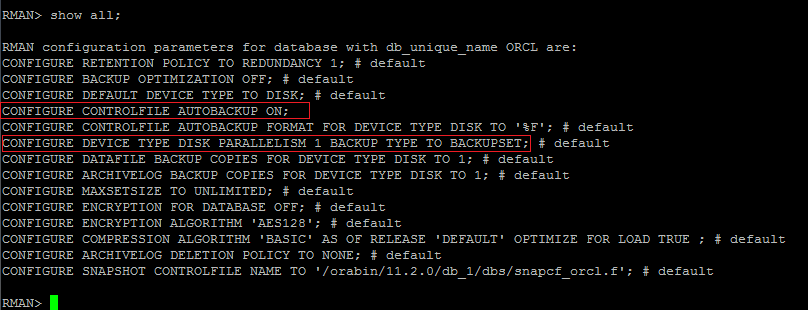
- Configure the auto backup of control file
RMAN> CONFIGURE CONTROLFILE AUTOBACKUP ON;

- Verify configuration:
Note: In this article, I am using the backup as backupset.
- Backup database with archive log:
RMAN> backup database plus archivelog delete all input;
Step 8: Copy All backup to the remote server:
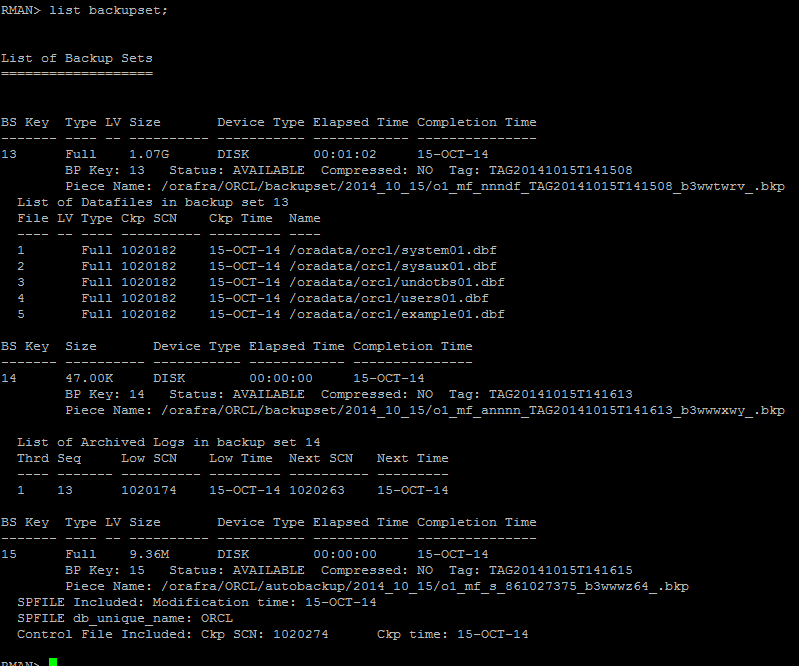
- Check the backupset with RMAN
RMAN> list backupset;
- the backups directory on the source Server:

- Copy backup directory to the remote server:

- Check the backup directory on the remote server:

Step 9: Restore database on the Remote Server:
- First restart control file on the remote server:
- Check the control file
$ ls ORCL/autobackup/2014_10_15/

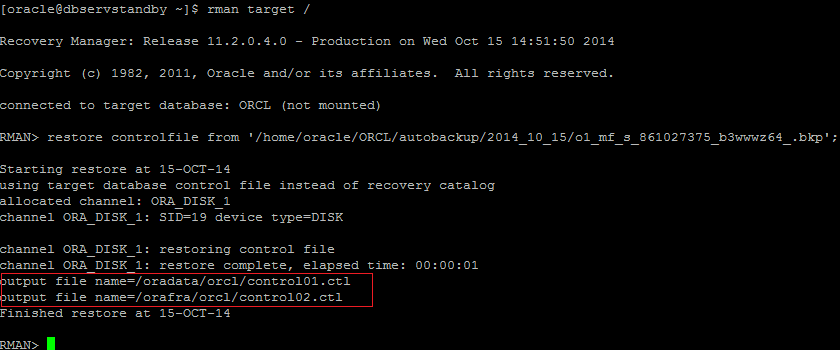
- Restore control file
$ rman target /
RMAN> restore controlfile from '/home/oracle/ORCL/autobackup/2014_10_15/o1_mf_s_861027375_b3wwwz64_.bkp';
- Mount the database
RMAN> alter database mount;

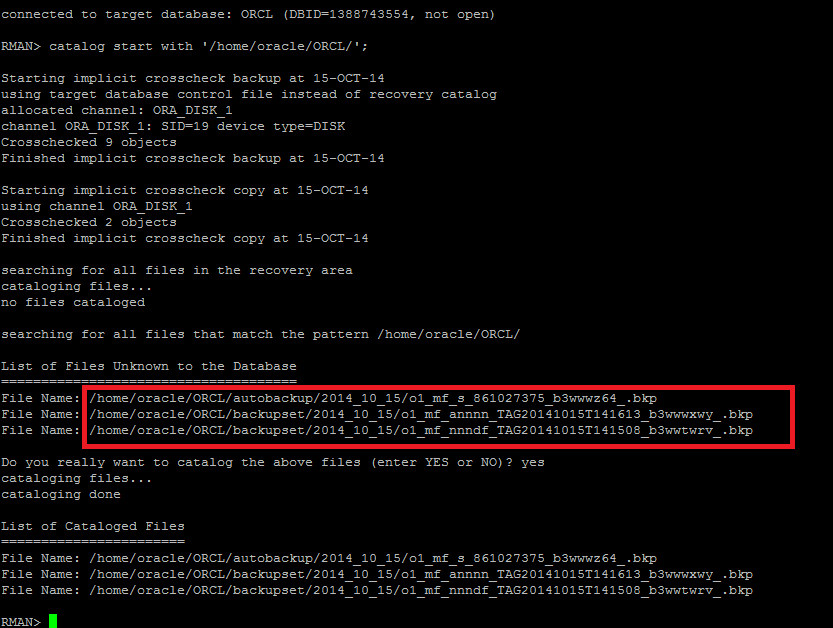
- Catalog the database
$ rman target /
RMAN> catalog start with '/home/oracle/ORCL/';
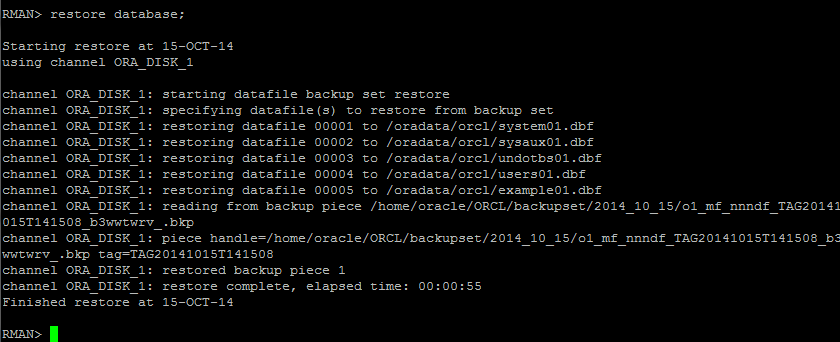
- Restore data file:
RMAN> restore database;
Note 1: At this step, remote Oracle database is on mount/read only mode contain the same data as the original database.
Note 2: If I add, modify or remove data on the original Oracle database, how can I update my remote Oracle Database to be as Active-passive High Availability solution, so check part 2.
Conclusion:
This article explains how to duplicate Oracle Database 11g. Also this article is the first part of an Active-passive High Availability Oracle database solution without using the Oracle DataGuard solution.


Pingback: Wadhah DAOUEHI - Part 2: Active-passive High Availability Solution for Oracle Database without Data Guard.