This article explains how to set up an Active Oracle database duplication with the RMAN command duplicate.
Table of Contents:
– Introduction
– Description of the environments
– Set up Active Oracle Database duplication
1. Introduction:
Recovery Manager (RMAN) is an Oracle Database client that performs backup and recovery tasks on your databases and automates administration of your backup strategies. It greatly simplifies backing up, restoring, and recovering database files. For more information.
RMAN has the ability to duplicate, or clone, an Oracle database from a backup or from an active database. It is possible to create a duplicate database on a remote server with the same or different file structure.
Oracle database 11g introduced the ability to create a duplicate databases directly without the need for a backup. This is known as active database duplication.
2. Description of the environments:
This table describes the environments of the Oracle Database server source and destination:
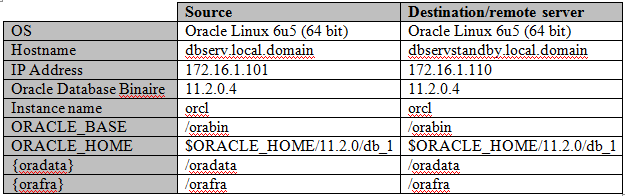
- Configuration of the file /etc/hosts on both Oracle Linux Server:
172.16.1.101    dbserv.local.domain     dbserv
172.16.1.110    dbservstandby.local.domain      dbservstandby
– On Source Oracle Linux

– On Remote Oracle Linux

3. Set up Oracle Active Database duplication:
Step 1: Verify that the archive log is enabled on the Oracle database Source.
SQL> archive log list;

Step 2: Copy the pfile from source to destination:
Create a PFILE for the duplicate database. Since we are duplicating the database with the same filesystem as the original, we don’t need to convert the file names. In this case, the PFILE is called “initorcl.ora” and is placed in the “$ORACLE_HOME/dbs” directory on the remote server.
- Create a pfile
SQL> create pfile='/tmp/initorcl.ora' from spfile;

- Copy the pfile on the remote server
$ scp /tmp/initorcl.ora 172.16.1.110:/orabin/11.2.0/db_1/dbs/
![]()
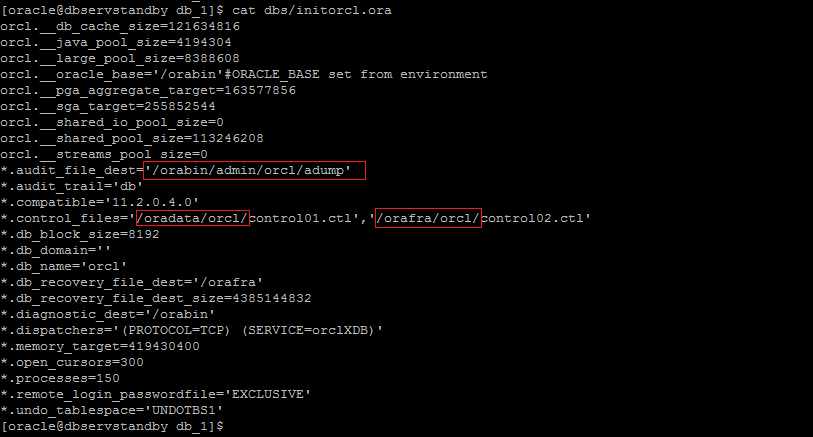
- Verify the initorcl.ora file on the remote server:

Step 3: Create the password file on the remote Server. (On my case password=oracle)
$ orapwd file=/orabin/11.2.0/db_1/dbs/orapworcl password=oracle entries=10

Step 4: Configure the tnsnames.ora on both Oracle Linux Server.
Both the source and destination database servers require a “tnsnames.ora” entry for the destination database.
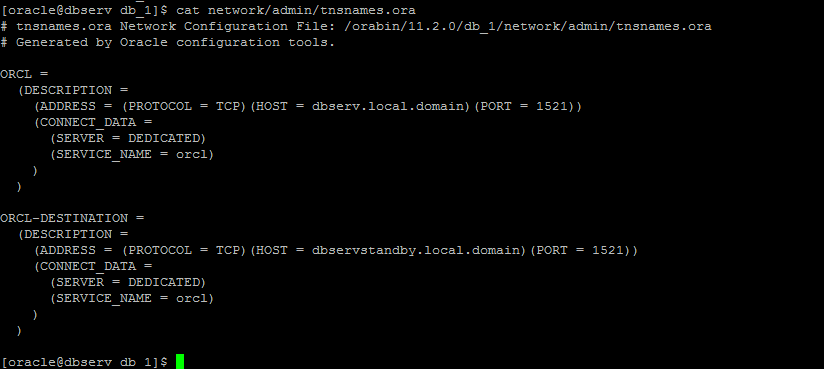
- On the Source Database: The default tnsnames looks like:
[oracle@dbserv db_1]$ cat network/admin/tnsnames.ora
# tnsnames.ora Network Configuration File: /orabin/11.2.0/db_1/network/admin/tnsnames.ora
# Generated by Oracle configuration tools.
ORCL =
  (DESCRIPTION =
    (ADDRESS = (PROTOCOL = TCP)(HOST = dbserv.local.domain)(PORT =
1521))
    (CONNECT_DATA =
      (SERVER = DEDICATED)
      (SERVICE_NAME = orcl)
)
  )

ORCL-DESTINATION =
  (DESCRIPTION =
    (ADDRESS = (PROTOCOL = TCP)(HOST = dbservstandby.local.domain)(PORT = 1521))
    (CONNECT_DATA =
      (SERVER = DEDICATED)
      (SERVICE_NAME = orcl)
    )
  )
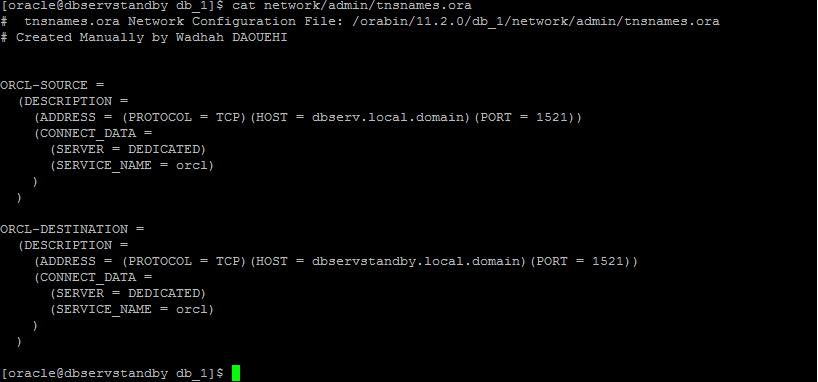
- On the Destination Database: Create the file tnsnames.ora
[oracle@dbservstandby db_1]$ cat network/admin/tnsnames.ora
#  tnsnames.ora Network Configuration File: /orabin/11.2.0/db_1/network/admin/tnsnames.ora
# Created Manually by Wadhah DAOUEHI
ORCL-SOURCE =
  (DESCRIPTION =
    (ADDRESS = (PROTOCOL = TCP)(HOST = dbserv.local.domain)(PORT = 1521))
    (CONNECT_DATA =
      (SERVER = DEDICATED)
      (SERVICE_NAME = orcl)
    )
  )

ORCL-DESTINATION =
  (DESCRIPTION =
    (ADDRESS = (PROTOCOL = TCP)(HOST = dbservstandby.local.domain)(PORT = 1521))
    (CONNECT_DATA =
      (SERVER = DEDICATED)
      (SERVICE_NAME = orcl)
    )
  )
Step 5: Create a static Listener configure on the remote Oracle Linux Server.
- Copy the listener file from the source to the remote server.
$ scp /orabin/11.2.0/db_1/network/admin/listener.ora dbservstandby:/orabin/11.2.0/db_1/network/admin/listener.ora

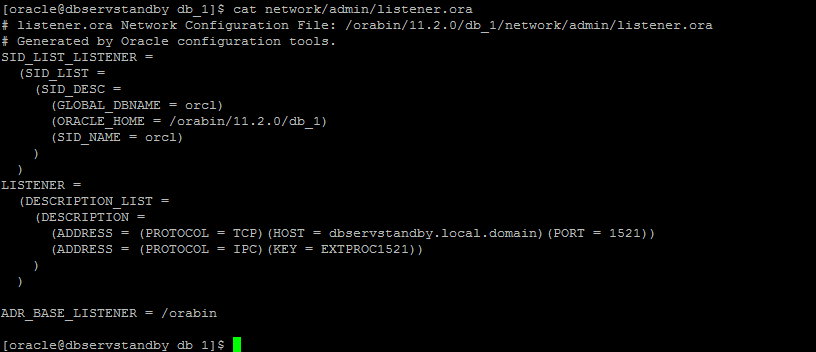
- Modify the configuration of the file listener.ora:
[oracle@dbservstandby db_1]$ cat network/admin/listener.ora
# listener.ora Network Configuration File: /orabin/11.2.0/db_1/network/admin/listener.ora
# Generated by Oracle configuration tools.
SID_LIST_LISTENER =
  (SID_LIST =
    (SID_DESC =
      (GLOBAL_DBNAME = orcl)
      (ORACLE_HOME = /orabin/11.2.0/db_1)
      (SID_NAME = orcl)
    )
  )
LISTENER =
  (DESCRIPTION_LIST =
    (DESCRIPTION =
      (ADDRESS = (PROTOCOL = TCP)(HOST = dbservstandby.local.domain)(PORT = 1521))
      (ADDRESS = (PROTOCOL = IPC)(KEY = EXTPROC1521))
    )
  )
ADR_BASE_LISTENER = /orabin
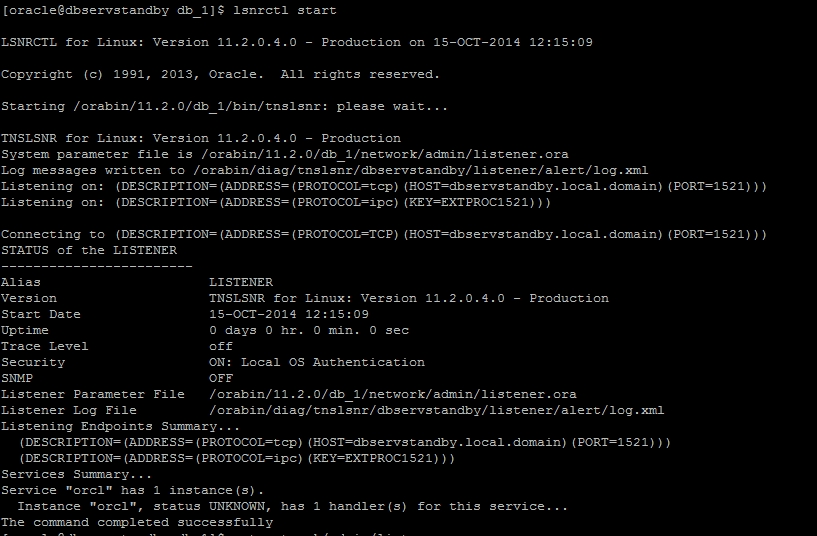
- Start the listener
[oracle@dbservstandby db_1]$ lsnrctl start
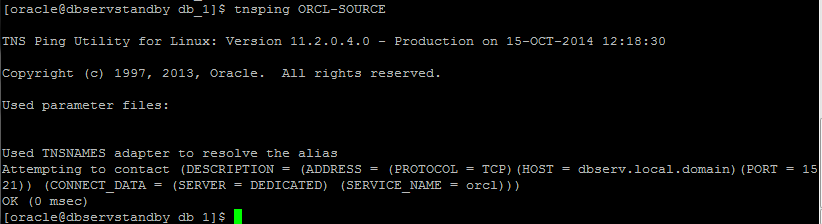
Step 6: Test de connectivity with tnsping from the Remote Server:
$ tnsping ORCL-SOURCE
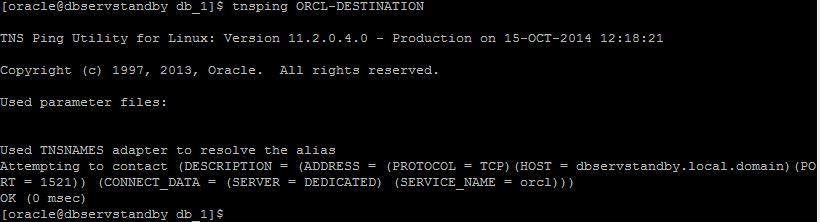
$ tnsping ORCL-DESTINATION
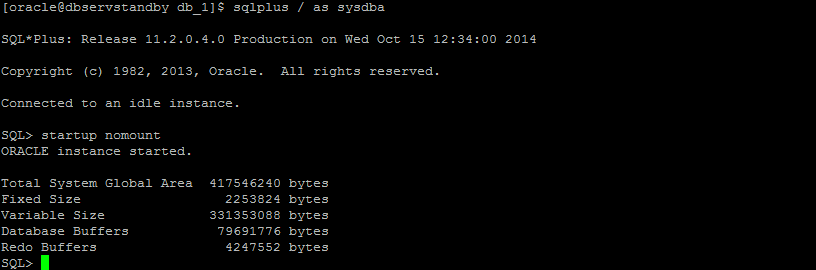
Step 7: Startup no mount the Oracle Database on the remote server:
- Create the absent directory:
$ mkdir -p /orabin/admin/orcl/adump
$ mkdir -p /oradata/orcl
$ mkdir -p /orafra/orcl

- Startup no mount:
Step 8: Duplicate the Oracle Database: On the Remote Oracle Linux Server
- Connect to target (Oracle Database source)and to the auxiliary database (Remote Oracle Database)with RMAN:
$ rman target sys/oracle@ORCL-SOURCE AUXILIARY sys/oracle@ORCL-DESTINATION

- Duplicate the database:
RMAN> duplicate database to orcl
2> from active database
3> spfile
4> nofilenamecheck;

…

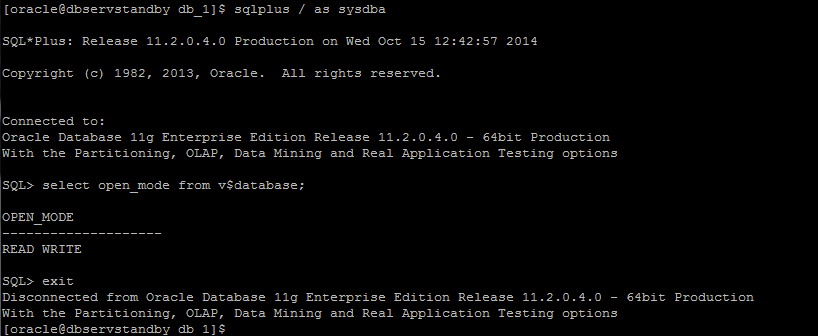
- Verify the remote Oracle Database state:
$ sqlplus / as sysdba
SQL> select open_mode from v$database;
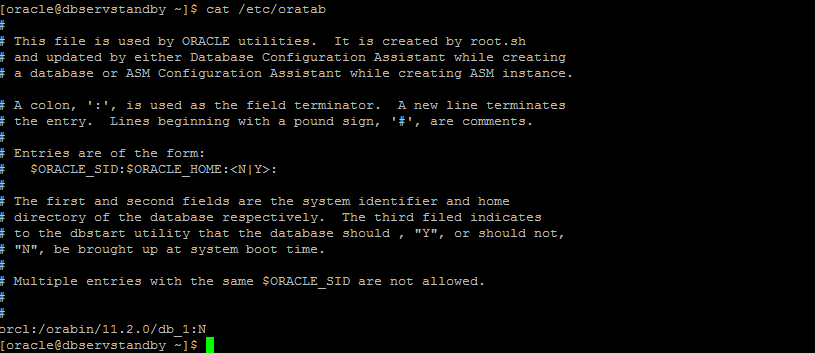
Step 9: Configure the file /etc/oratab:
$ cat /etc/oratab
Conclusion:
This article explains how to set up an Active duplicate Oracle Database 11g.