This article explains how to upgrade Oracle database from the version 11gR2 (11.2.0.1) to the version 11.2.0.4 using the RMAN Full backup.
Table of Contents:
– Introduction
– Description of the environments
– Steps of Oracle Database 11g (11.2.0.1) Backup
– Steps of Oracle Database 11g (11.2.0.4) Restore
1. Introduction:
Recovery Manager (RMAN) is an Oracle Database client that performs backup and recovery tasks on your databases and automates administration of your backup strategies. It greatly simplifies backing up, restoring, and recovering database files. For more information.
2. Description of the environments:
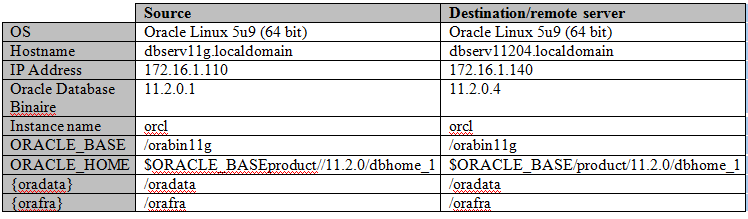
This table describes the environments of the Oracle Database server source and destination:
- Configuration of the file /etc/hosts on both Linux Server:
172.16.1.110    dbserv11g.localdomain     dbserv11g
172.16.1.140    dbserv11204.localdomain      dbserv11204
- Creation of needed directory on both Linux Server:
# mkdir  /orabin11g  /oradata   /orafra
# chown oracle:oinstall /orabin11g  /oradata   /orafra
# chmod 775  /orabin11g    /oradata   /orafra
3. Steps of Oracle Database 11g backup:
Note: This article describes the backup steps on the production server and also the restore steps on the 11.2.0.4 Server, and doesn’t describe the steps how to install the Oracle database 11g which they has been described on the previous articles.
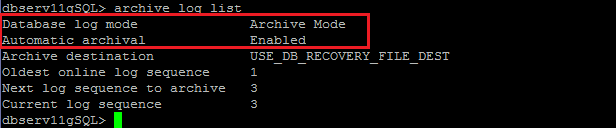
Step 1: Verify that the archive log is enabled on the Linux database 11g.
dbserv11gSQL> archive log list;
Step 2: Verify the backup destination on the 11g Server:

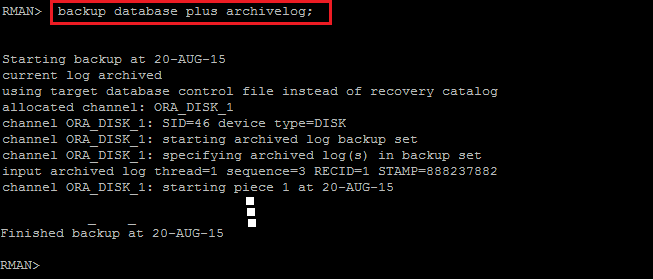
Step 3: Backup 11g database plus archive log:
Step 4: Verify the backup on the 11g Server:
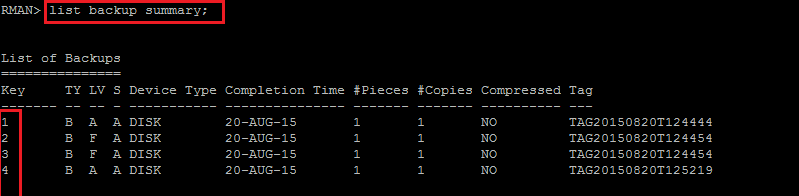
– List Backup summary:
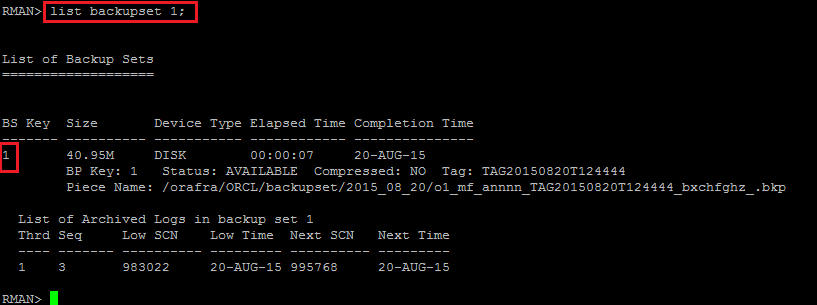
– List backup piece 1:
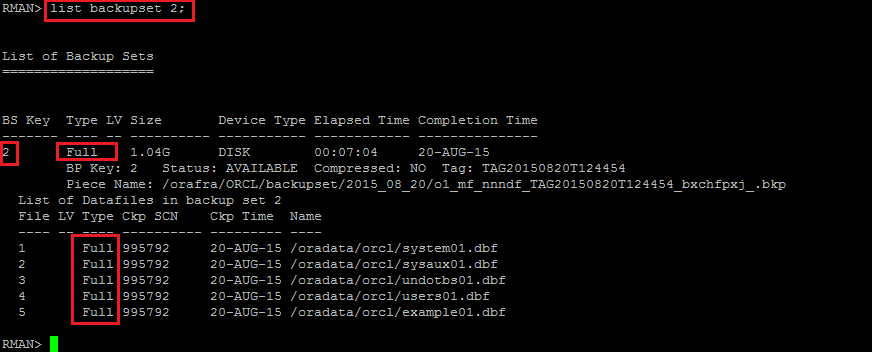
– List backup piece 2:
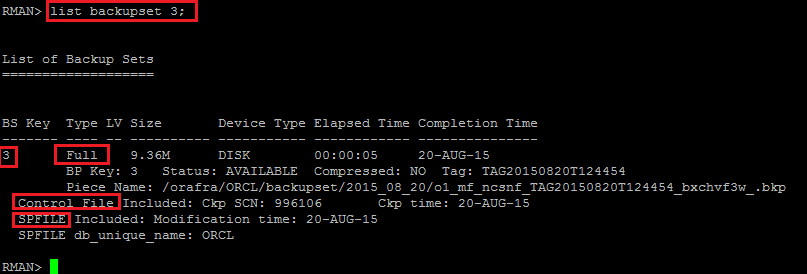
– List backup piece 3 (contains the control file backup):
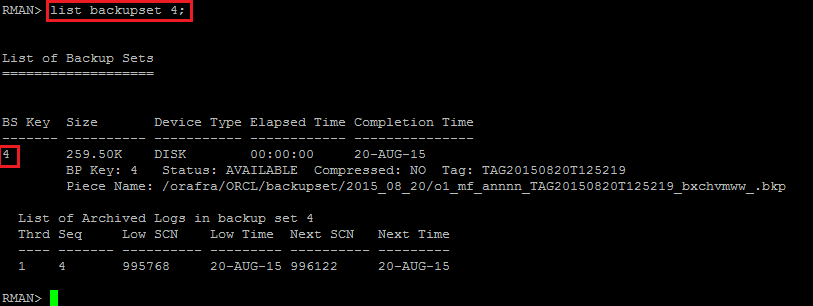
– List backup piece 4:
Step 5: Copy the backup pieces from Server 11g to Server 11.2.0.4:
$ scp -r /orafra/ORCL/backupset/2015_08_20/ dbserv11204:/orafra/
Step 6: Create and copy the pfile from source 11g to destination 11.2.0.4:
Create a PFILE for the 11.2.0.4 database. Since we are restoring the database with the same filesystem and locations as the original, we don’t need to convert the file names. In this case, the PFILE is called “initorcl.ora” and is placed in the “$ORACLE_HOME/dbs” directory on the 11.2.0.4 server.
- Create a pfile
dbserv11gSQL> create pfile='/tmp/initorcl.ora' from spfile;
- Copy the pfile to the remote server:
$ scp /tmp/initorcl.ora dbserv11204:/orabin11g/product/11.2.0/dbhome_1/dbs
4. Steps of Oracle Database 11.2.0.4 Restore:
Note: After the installation of the Oracle 11.2.0.4 Binary, and the creation of the Listener using the netca tool, it’s time to modify the pfile and the creation of the password file:
Step 1: Verify the pfile initorcl.ora on the 11.2.0.4 Server:

Step 2: Set UP the pfile parameters:
Note: Create the absent directory:
![]()
Step 3: Create the password file on the 11.2.0.4 Server. (On my case password=oracle)
![]()
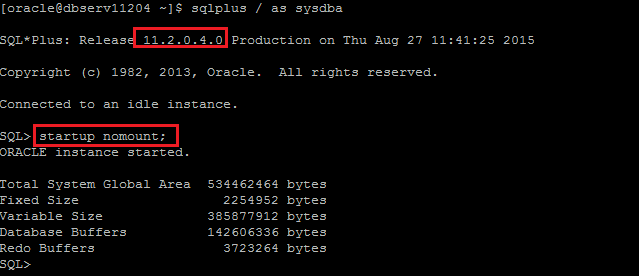
Step 4: Startup the orcl 11.2.0.4 instance on the 11.2.0.4 Server.
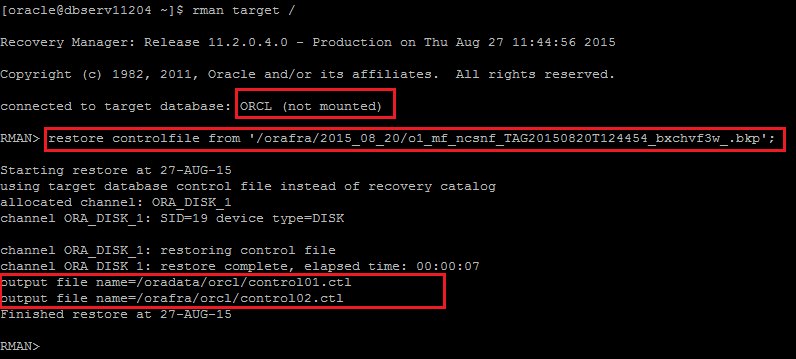
Step 5: Restore the Control file on the 11.2.0.4 Server.
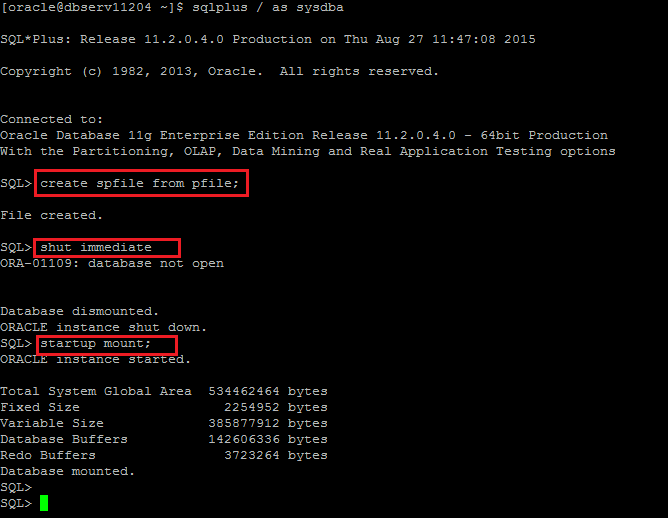
Step 6: Startup mount

Step 7: Re-Startup the instance with spfile:
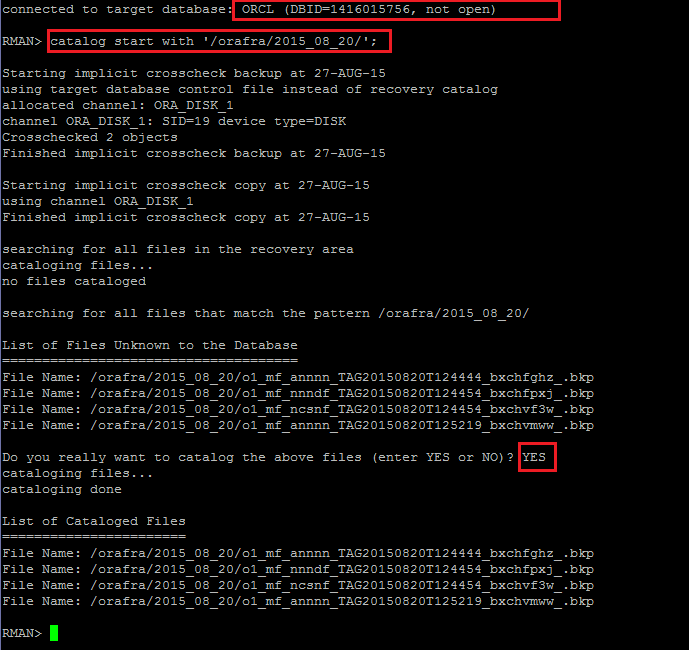
Step 8: Catalog the 11g backup within the controlfile:
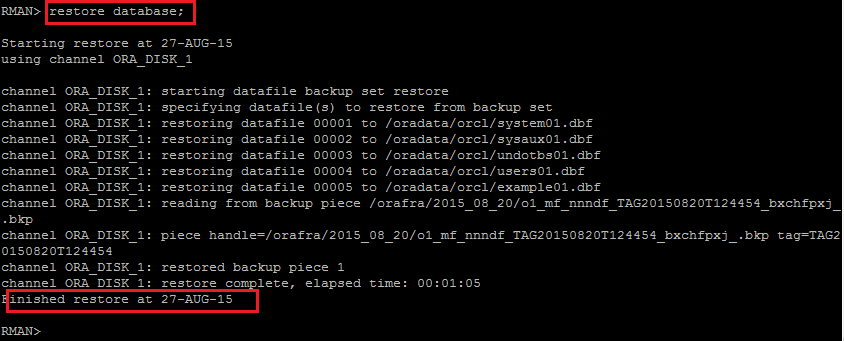
Step 9: Restore database:
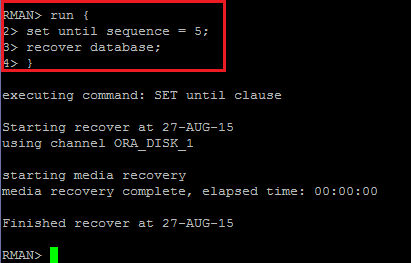
Step 10: Recover database:
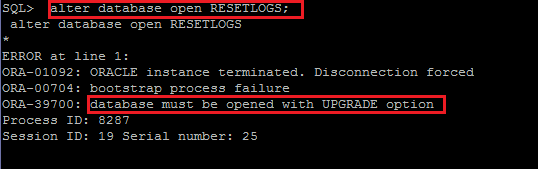
Step 11: Alter database open resetlogs:
Note 1: After the restore of the controlfile, we should open the database with the options resetlogs or notresetlogs.
Note 2: While the backup is done with 11.2.0.1 and the restore with 11.2.0.4, we see the natural behavior ORA-39700.
Step 12: startup upgrade:
SQL> startup upgrade
Step 13: Run the Upgrade script “$ORACLE_HOME/rdbms/admin/catupgrd.sql”:
SQL> @/orabin11g/product/11.2.0/dbhome_1/rdbms/admin/catupgrd.sql
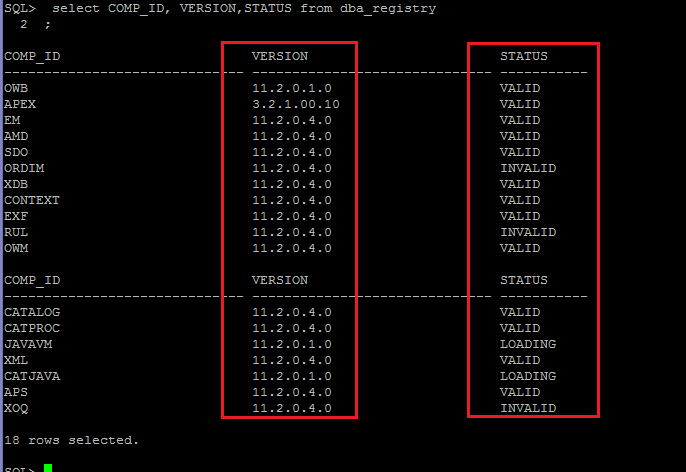
Step 14: Verify the upgrade of the Oracle database components:
Step 15: Recompile the Invalid objects after upgrade using the script utlrp.sql :
![]()
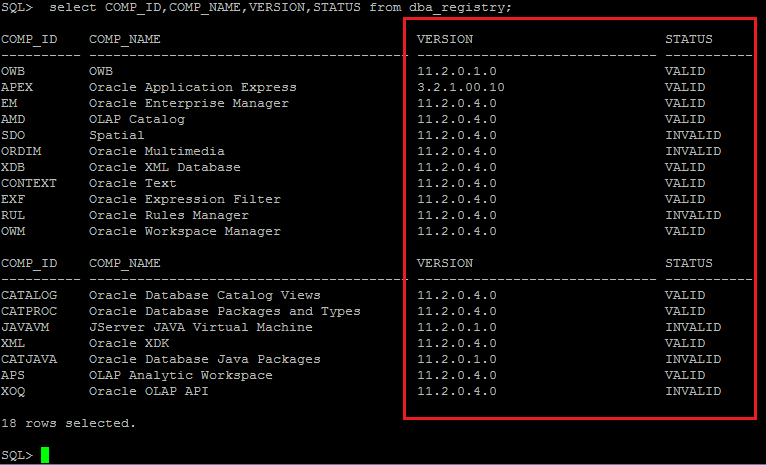
Step 16: Re-verification of the Oracle database components:
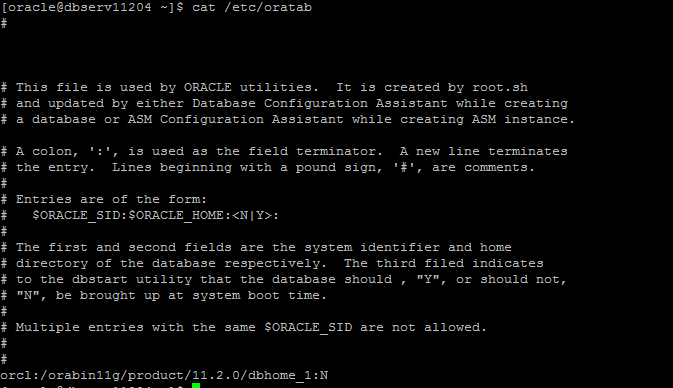
Step 17: Configure the file /etc/oratab:
Conclusion:
This article explains how to Upgrade Oracle Database 11.2.0.1 to the version 11.2.0.4 using the backup RMAN.