This article explains how to set up a DNS configuration on Red Hat Enterprise Linux. I will set up a basic configuration for a DNS server and also I will set up a specific configuration for the SCAN (Single Client Access Name) with Oracle RAC Database.
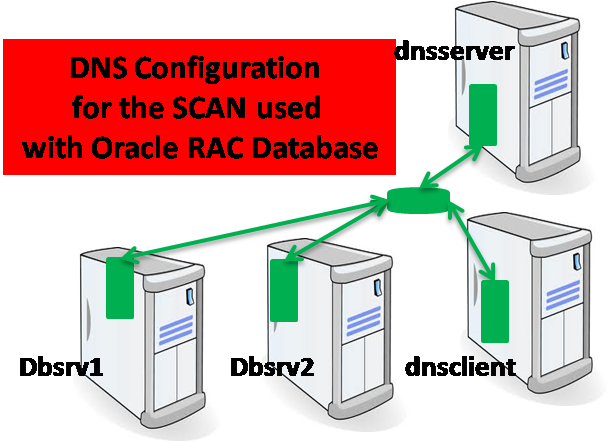
Table of Contents:
- Install DNS Server
- Configure DNS Server
1. Install DNS Server:
DNS (Domain Name System), also known as a nameserver, is a network system that associates hostnames with their respective IP addresses. For users, this has the advantage that they can refer to machines on the network by names that are usually easier to remember than the numerical network addresses. For system administrators, using the nameserver allows them to change the IP address for a host without ever affecting the name-based queries, or to decide which machines handle these queries. For more information, see this URL.
BIND (Berkeley Internet Name Domain) consists of a set of DNS-related programs. It contains a nameserver called named.
Step 1: Install DNS Server with yum:
![]()
Step 2: Install DNS Server with RPM:
![]()
2. Configuring the DNS Server:
When the named service is started, it reads the configuration from the file /etc/maned.conf
In this example, I will use the network address 172.16.1.0/24
dnsserver: 172.16.1.10
dbsrv1: 172.17.1.111
dbsrv2: 172.17.1.112
dnsclient: 172.17.1.2
Step 1: Configure the /etc/named.conf file:
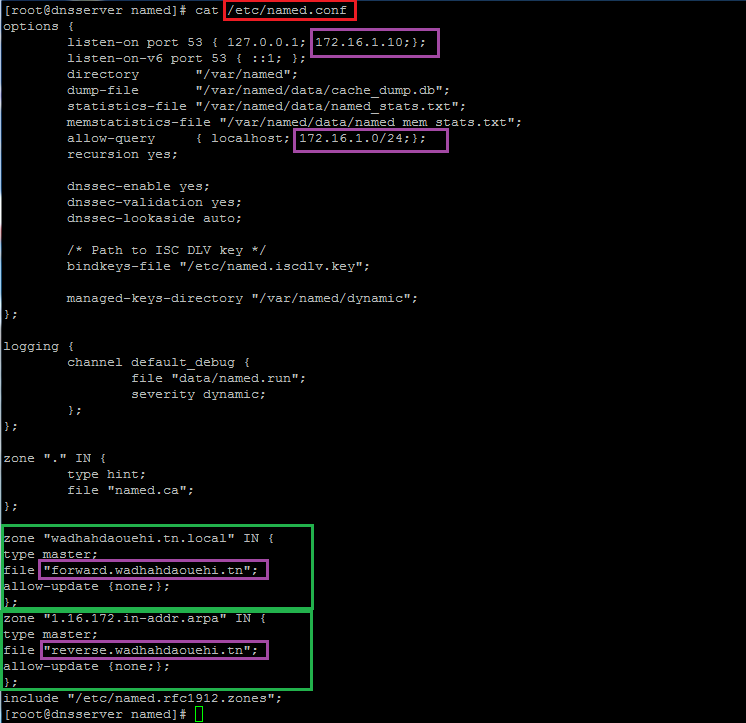
Step 2: Create forward and reverse zone files in the ‘/etc/named.conf’ file.
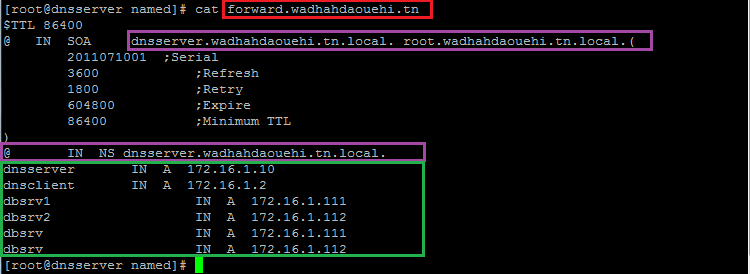
Step 2.1: Create Forward Zone
Create forward.wadhahdaouehi.tn file in the ‘/var/named’ directory.

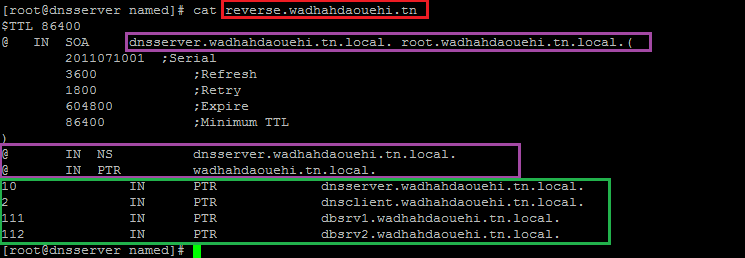
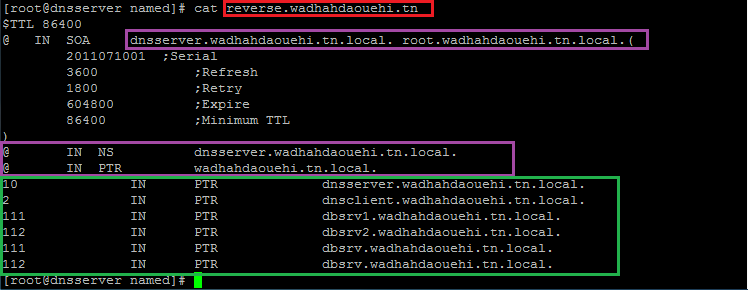
Step 2.2: Create Reverse Zone
Create reverse.wadhahdaouehi.tn file in the ‘/var/named’ directory.
Step 3: Test DNS Configuration
Add the DNS server details in ‘/etc/resolv.conf’ file in the client system
![]()
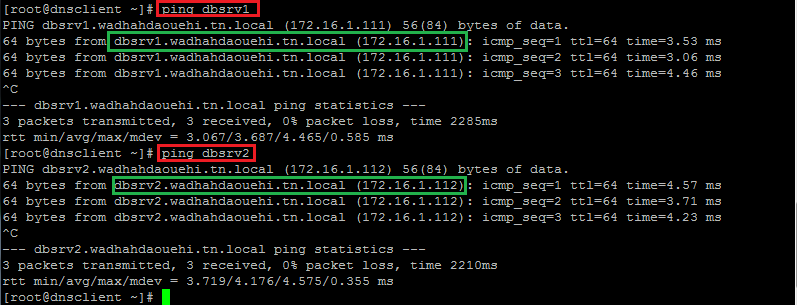
Verify with ping:
Step 4: Configuring the DNS Server for the SCAN used with Oracle RAC Database:
Step 4.1: In forward.wadhahdaouehi.tn file, add two lines for two IP address.
Step 4.2: In reverse.wadhahdaouehi.tn file, add two lines for two IP address.
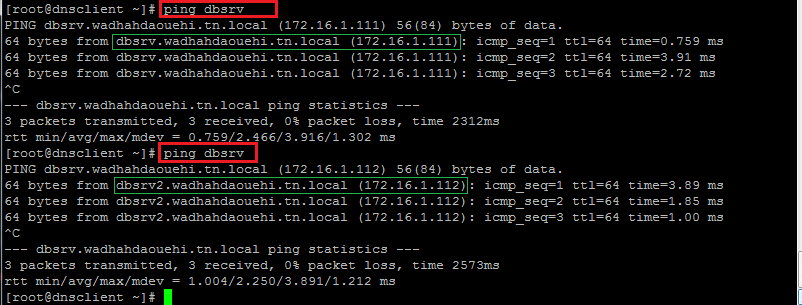
Step 4.3: Test DNS Configuration.
Conclusion:
This article provides the basic DNS configuration steps to use the Single Client Access Name (SCAN) with Oracle RAC Database.