Disclaimer: The steps described below have only been tested in a lab environment.
ORACLE Linux allows administrators to bind multiple network interfaces together into a single channel using the bonding kernel module. Oracle Cluster File System OCFS2 is a high performance, high availability, POSIX compliant general-purpose filesystem for Linux. Linux bonding and OCFS2 file system are a perfect solution for high availability.
This article explains how to set up Oracle Cluster File System over IP Multipathing (Linux bonding).
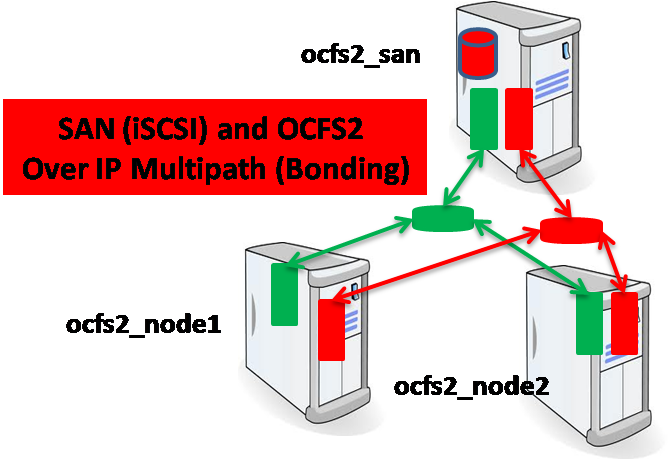
Figure: SAN and OCFS2 over IP Multipathing (Linux bonding)
Tables of contents:
- Linux bonding
- SAN (iSCSI)
- OCFS2 filesystem
1. Linux Bonding:
ORACLE/Red Hat Enterprise Linux allows administrators to bind multiple network interfaces together into a single channel using the bonding kernel module and a special network interface called a channel bonding interface. Channel bonding enables two or more network interfaces to act as one, simultaneously increasing the bandwidth and providing redundancy. for more information.
To set up a Linux bonding, there are many parameters and you having to specify the bonding policy. In my case, the bonding policy is active-backup (mode 1) for fault tolerance. Transmissions are received and sent out via the first available bonded slave interface. Another bonded slave interface is only used if the active bonded slave interface fails. For more information about bonding parameters and policy, see this URL.
Step 1: Create a channel bonding interface (On ALL Nodes and on SAN Server).
Create a channel bonding interface file such as ifcfg-bond0:
ON Node1:

ON Node2:

ON SAN Server:

Step 2: Configure the two Ethernet cards (On ALL Nodes)
Change the configuration of your network interfaces: in my case i have ETH1 and ETH2.


Step 3: Restart network service:
Restart your network service.
# service network restart
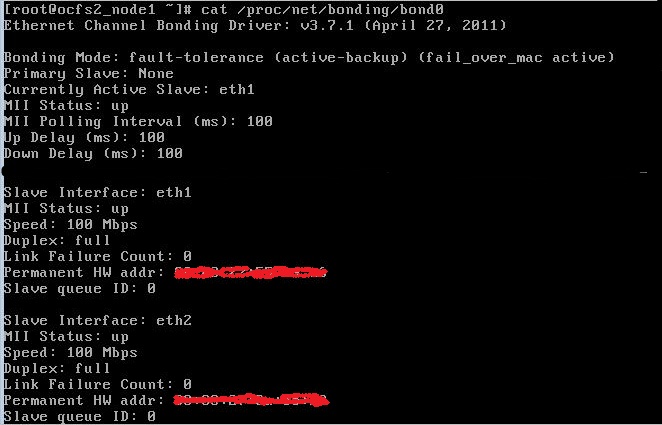
Step 4: Verification:
To verify the configuration:
Note 1: Set up this configuration on all your machines (from step 1 through step 4).
Note 2: Take care for choosing the host name and the network IP Address, Don’t forget to configure the /etc/hosts file.

2- SAN (iSCSI):
In computing, iSCSI is an acronym for Internet Small Computer System Interface, an Internet Protocol (IP)-based storage networking standard for linking data storage facilities. By carrying SCSI commands over IP networks, iSCSI is used to facilitate data transfers over intranets and to manage storage over long distances. iSCSI can be used to transmit data over LANs, WANs… The protocol allows clients (called initiators) to send SCSI commands to SCSI storage devices (targets) on remote servers. It is a storage area network (SAN) protocol, allowing organizations to consolidate storage into data center storage arrays while providing hosts with the illusion of locally attached disks,for more information.
Step 1: Install and Configure SCSI Target on the SAN Server:
– To install SCSI Target:
![]()
– To configure your iSCSI server (SCSI Target):
– Start your SCSI target service
![]()
– For auto start after reboot:

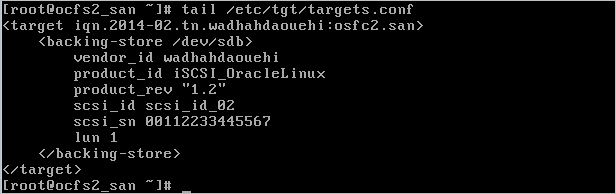
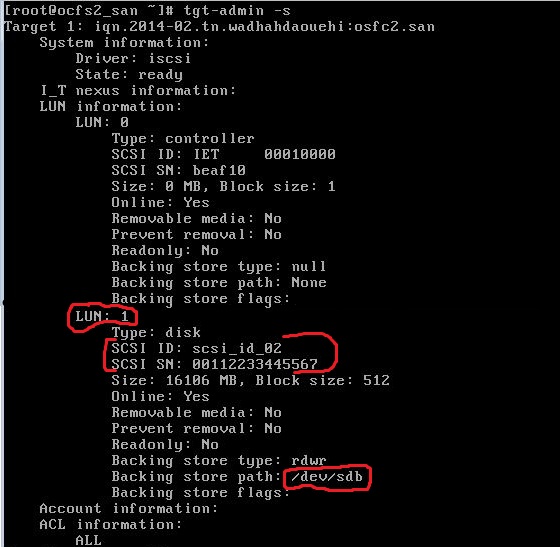
– To verify the iSCSI Target configuration:
Step 2: Install and Configure SCSI Initiator on the OCFS2 Node: Do this step on both Nodes.
– Install SCSI Initiator.
![]()
– Set up SCSI Initiator on Node:


Note: Set up the same configuration on step 2 on both OCFS2 Node.
3- OCFS2 filesystem:
Clustering is the concept of connecting multiple servers together to act as a single system, providing additional resources for workloads and failover capabilities for high availability. Clustered systems frequently use a heartbeat to maintain services within the cluster. A heartbeat provides information– such as membership and resource information–to the nodes within the cluster and can be used to alert nodes of potential failures. Clustered systems typically are designed to share network and disk resources and communicate with one another using a node heartbeat to maintain services within the cluster. for more information, see this URL.
Step 1: Install the OCFS2 Tool on both Nodes.
![]()
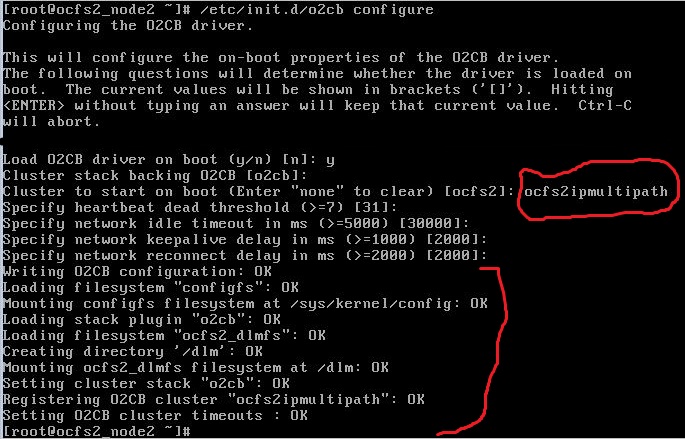
Step 2: To set up an Oracle file system cluster on both Nodes.
When designing your OCFS2 file system it is important to keep in mind the number of nodes that you select for your cluster. In my case i have two nodes. Configuration of the /etc/ocfs2/cluster.conf file can be done manually but the recommended option is using the o2cb cluster registration utility for the o2cb cluster stack.

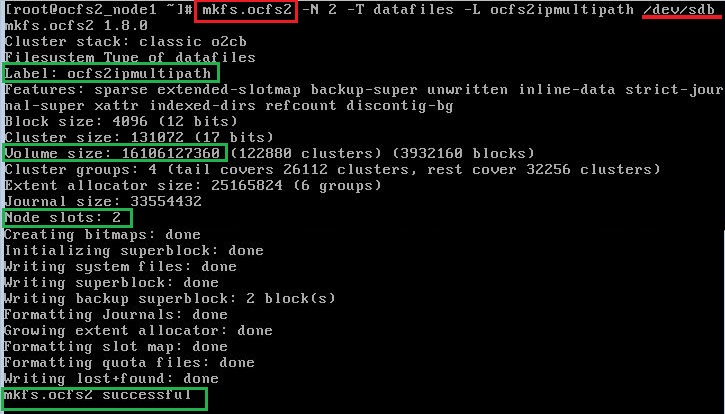
Step 3: Make an Oracle file system on one node.
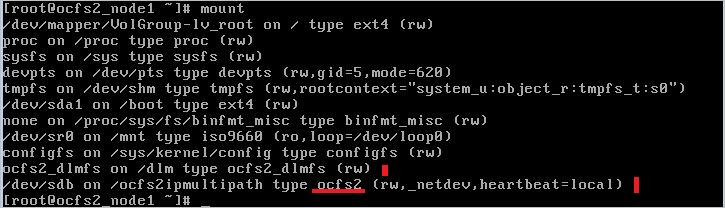
step 4: Mount your OCFS2 file system on both Nodes:
![]()
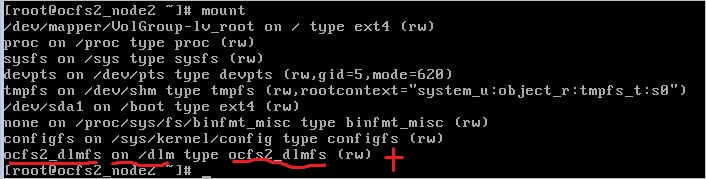
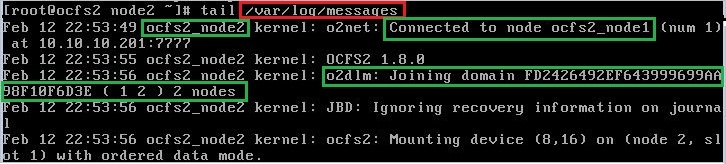
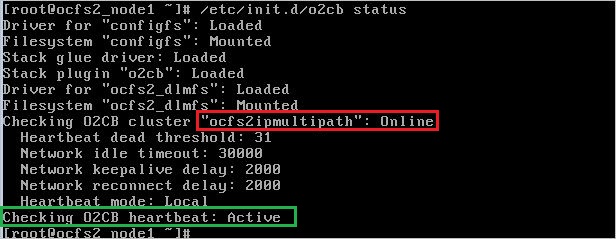
Step 5: To verify the ocfs2 file system set up:
– Verify with the /var/log/messages file log.
– Verify the status of the cluster with o2cb Tool.
Step 6: For permanent OCFS2 file system mount.
– It is recommended to mount the the device with UUID or LABEL rather than device name.

– Edit the file /etc/fstab

Step 7: OCFS2 and Iptables:
![]()
Step 8: OCFS2 with Security-Enhanced Linux.
Conclusion:
This article explains how to set up OCFS2 file system on two nodes over IP Multipath on two Ethernet cards. For more information on OCFS2 file system, see this URL.