This article explains the steps to install the Oracle database 19c3 software while creating an Oracle database CDB on Oracle ASM disk group on Oracle Linux 7u5.
Tables of contents:
- Install all the prerequists
- Unzip the Oracle database binary
- Install the Oracle database software
1. Install all the prerequists
We have already the Oracle Grid Infrastructure installed on the Oracle Linux, so all the system Linux prerequists have been installed.
Install Oracle Grid Infrastructure Standalone 19c3
Create a new ASM DiskGoup on 19c3
2. Unzip the Oracle Databas Home binary :
# mkdir –p /u01/app/oracle/product/19.3.0/dbhome_1
# chown –R oracle :oinstall /u01/app/oracle
# chmod –R 775 /u01/app/oracle
$ unzip  LINUX.X64_193000_db_home.zip  -d /u01/app/oracle/product/19.3.0/dbhome_1
2. Install the Oracle database software:
Step 1 : Install the Software :
$ cd /u01/app/oracle/product/19.3.0/dbhome_1
$ ./runInstaller

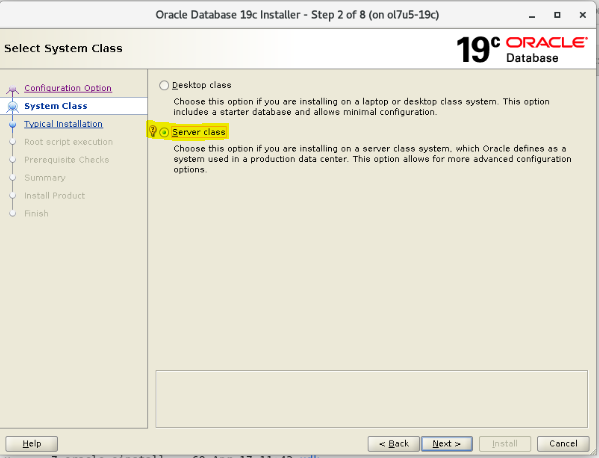
Step 2 : Choose System Server Class
Step 3 : Which database edition.

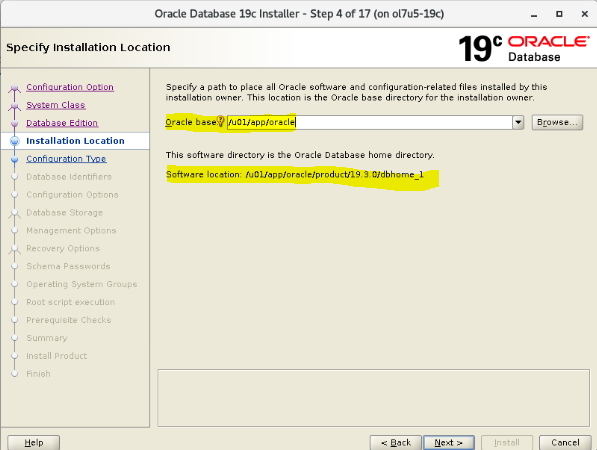
Step 4 : Oracle Base destination
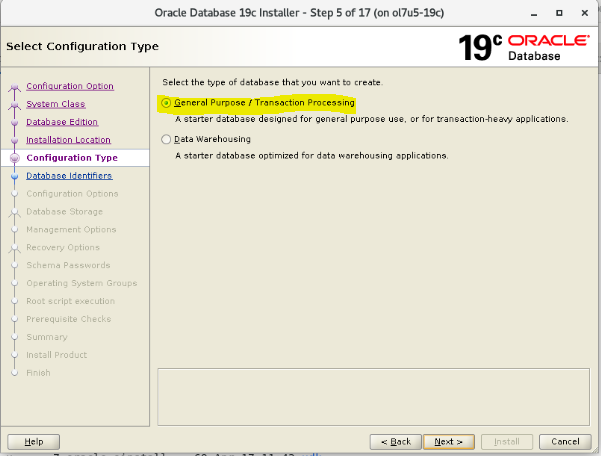
Step 5 : Database type
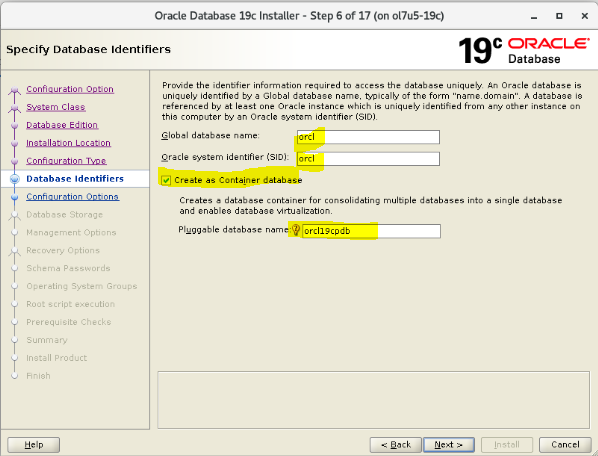
Step 6 : Specify database identifiers
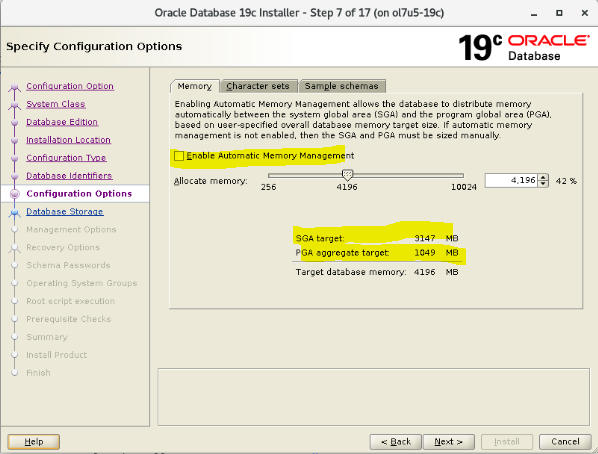
Step 7a : Enable/Disable automatic memory management
Step 7b : Choose the character sets

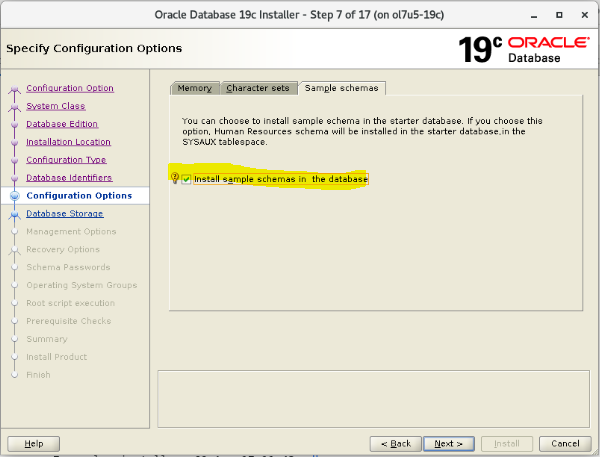
Step 7c : Install or not the sample schemas in the database
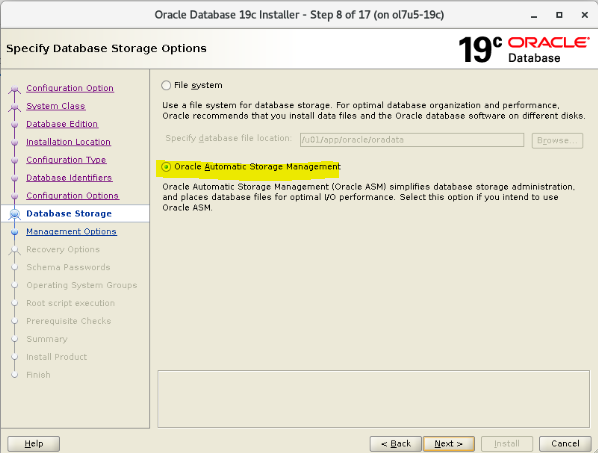
Step 8 : Specify database storage options, choose ASM
Step 9 : Specify management options

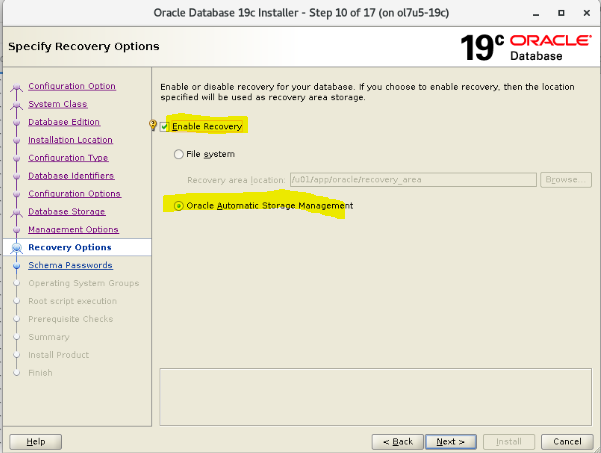
Step 10 : Enable/disable recovery
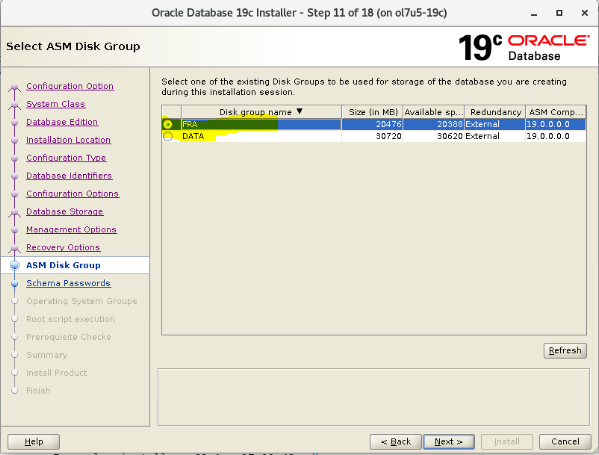
Step 11 : Select ASM disk group
Step 12 : Set up the ASM password
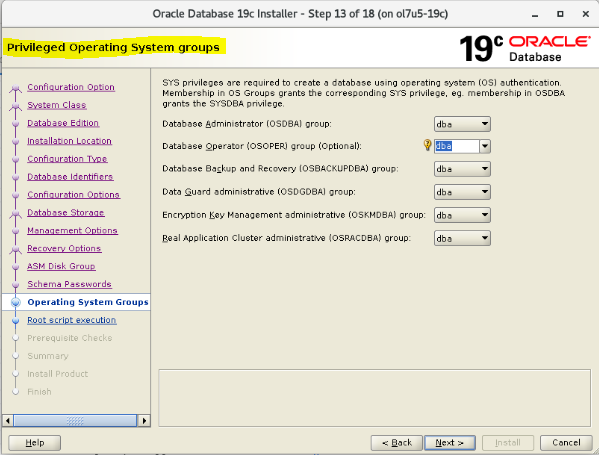
Step 13 : Set privileged operating system groups
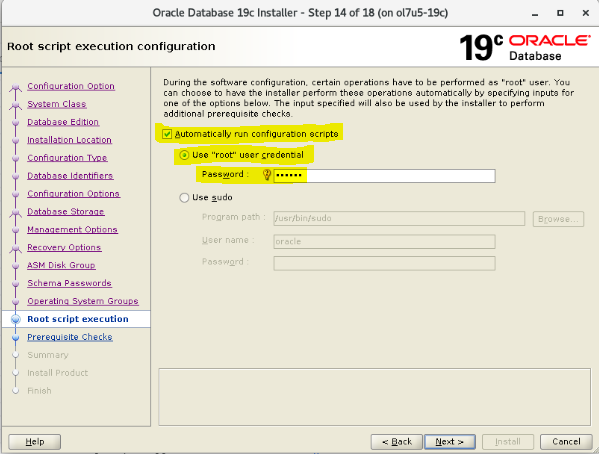
Step 14 : root script execution configuration
Step 15 : Perform prerequisite checks
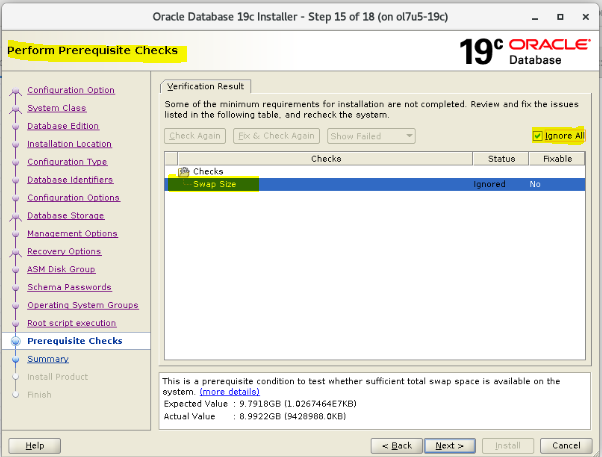
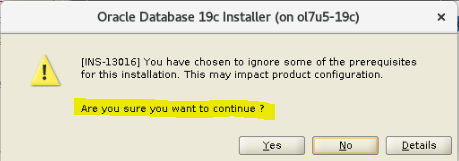
Note : In my case, I have only ignored the swap, but not recommanded for production
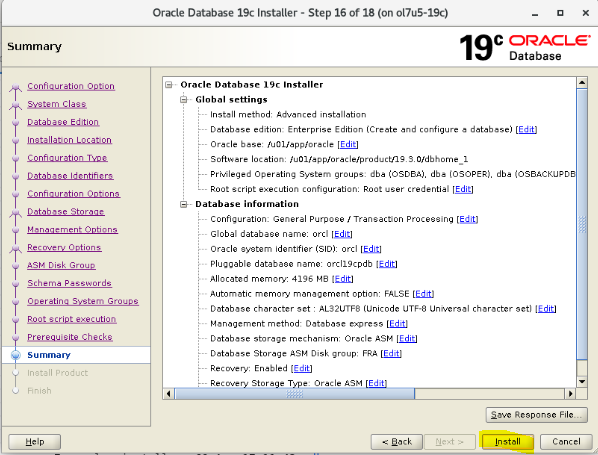
Step 16 : begin Installation
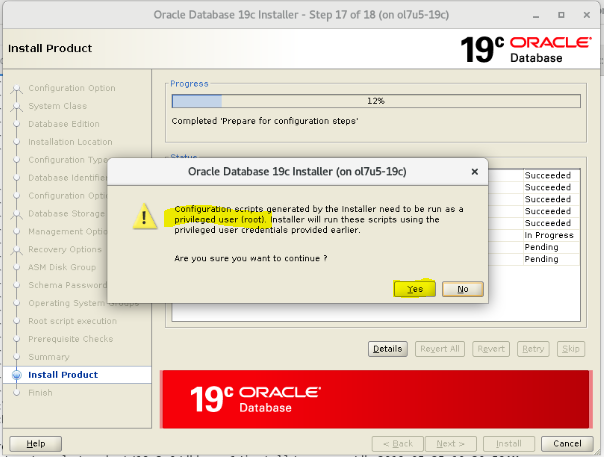
Step 17 : Installation progress
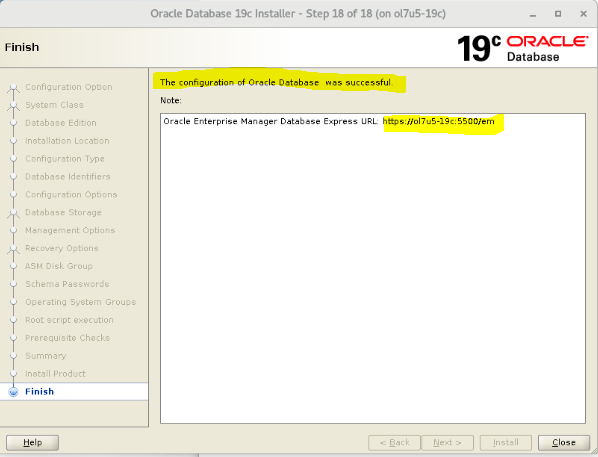
Step 18 : End of installation
3. Check the Oracle database resource within the Grid Infrastructure :
$ crsctl stat res -t
--------------------------------------------------------------------------------
Name           Target  State        Server                   State details
--------------------------------------------------------------------------------
Local Resources
--------------------------------------------------------------------------------
ora.DATA.dg            ONLINE  ONLINE       ol7u5-19c     STABLE
ora.FRA.dg             ONLINE  ONLINE       ol7u5-19c     STABLE
ora.LISTENER.lsnr      ONLINE  ONLINE       ol7u5-19c     STABLE
ora.asm                ONLINE  ONLINE       ol7u5-19c     Started,STABLE
ora.ons                OFFLINE OFFLINE      ol7u5-19c     STABLE
--------------------------------------------------------------------------------
Cluster Resources
--------------------------------------------------------------------------------
ora.cssd
      1        ONLINE  ONLINE       ol7u5-19c                STABLE
ora.diskmon
      1        OFFLINE OFFLINE                               STABLE
ora.evmd
      1        ONLINE  ONLINE       ol7u5-19c                STABLE
ora.orcl.db
      1        ONLINE  ONLINE       ol7u5-19c                Open,HOME=/u01/app/oracle/product/19.3.0/dbhome_1,STABLE
--------------------------------------------------------------------------------
[oracle@ol7u5-19c dbhome_1]$
Conclusion :
We have enjoyed the creation on an Oracle database ORCL CDB with 19c3 on ASM within Oracle Linux 7u5.