This article explains the steps to install Oracle Grid Intrastructure Standalone 19c3 on Oracle Linux 7u5.
Tables of contents:
- Install the system Linux prerequists
- Install the Oracle Grid Infrastructure Standalone
- Check the Grid resource
1. Install the system Linux prerequists
a. Install the package oracle-database-preinstall-19c:
The package oracle-database-preinstall-19c contains all the prerequists on ORacle Linux using the Oracle Unbreakable Enterprise Kernel (UEK).
# yum install -y oracle-database-preinstall-19c.x86_64
b. Set ASM disks :
# oracleasm configure -i
Configuring the Oracle ASM library driver.
This will configure the on-boot properties of the Oracle ASM library
driver.  The following questions will determine whether the driver is
loaded on boot and what permissions it will have.  The current values
will be shown in brackets ('[]').  Hitting <ENTER> without typing an
answer will keep that current value.  Ctrl-C will abort.
Default user to own the driver interface []: oracle
Default group to own the driver interface []: dba
Start Oracle ASM library driver on boot (y/n) [n]: y
Scan for Oracle ASM disks on boot (y/n) [y]: y
Writing Oracle ASM library driver configuration: done
c. Create ASM disks
# oracleasm createdisk DATA /dev/ASM/LV_DATA
Writing disk header: done
Instantiating disk: done
[root@ol7u5-19c ~]# oracleasm createdisk FRA /dev/ASM/LV_FRA
Writing disk header: done
Instantiating disk: done
# ll /dev/oracleasm/disks/
total 0
brw-rw---- 1 oracle dba 249, 2 May 25 08:17 DATA
brw-rw---- 1 oracle dba 249, 3 May 25 08:17 FRA
d. Create the directory grid home :
# mkdir -p /u01/app/grid
# chown -R oracle:oinstall /u01/app/
$ unzip LINUX.X64_193000_grid_home.zip -d /u01/app/grid/
2. Install the Oracle Grid Infrastructure Standalone 19c3:
Step 1 : Install the package cvudisk
# rpm -ivh /u01/app/grid/cv/rpm/cvuqdisk-1.0.10-1.rpm
Step 2 : Grid setup

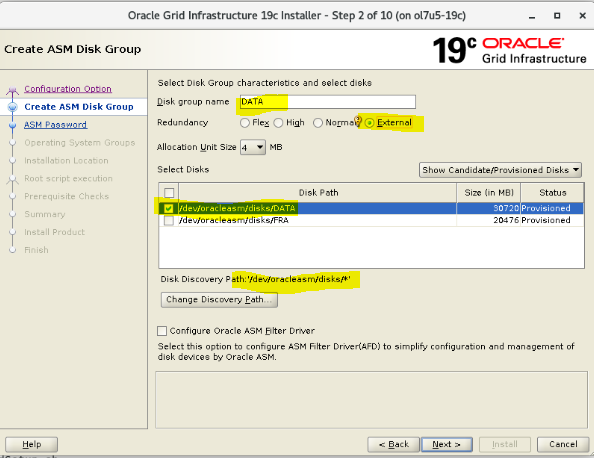
Step 3 : Create the diskgroup DATA
Step 4 : Set up the user password

Step 5 : If you have an Oracle Enterprise Manager Cloud Control :

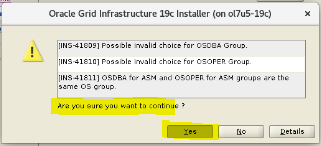
Step 6 : Manage groups
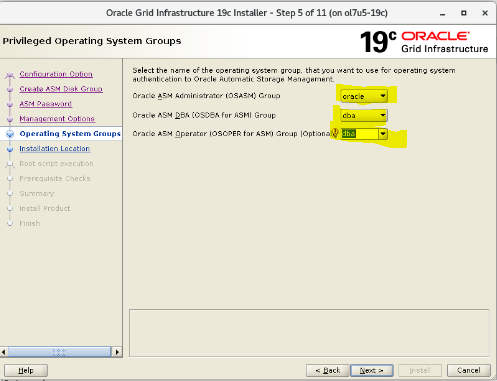
Note : Check you Linux groups
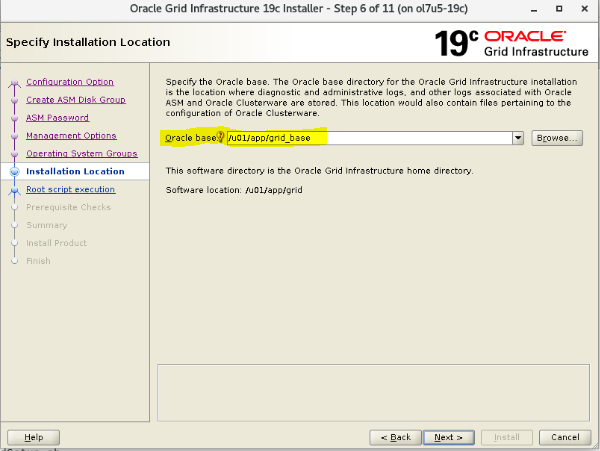
Step 7 : Manage Oracle Base
Step 8 : Inventary directory
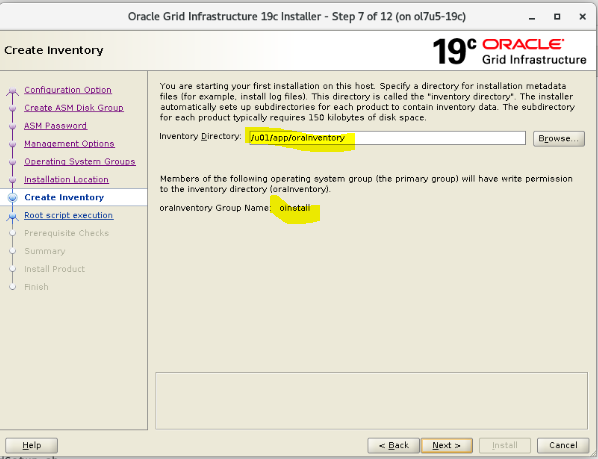
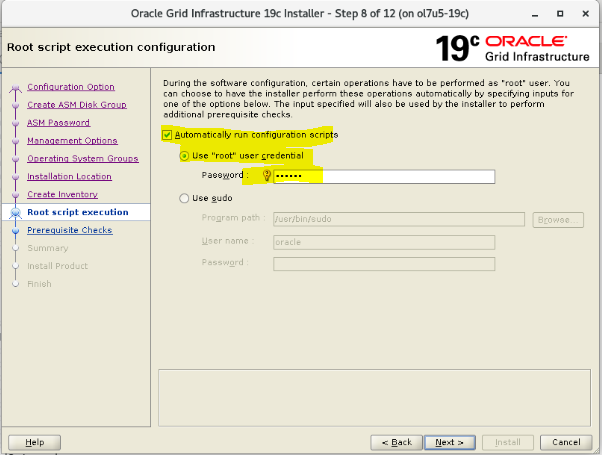
Step 9 : For automatic root scripts install, set the Linux user root password or sudoers user.
Step 10 : Prerequist checks
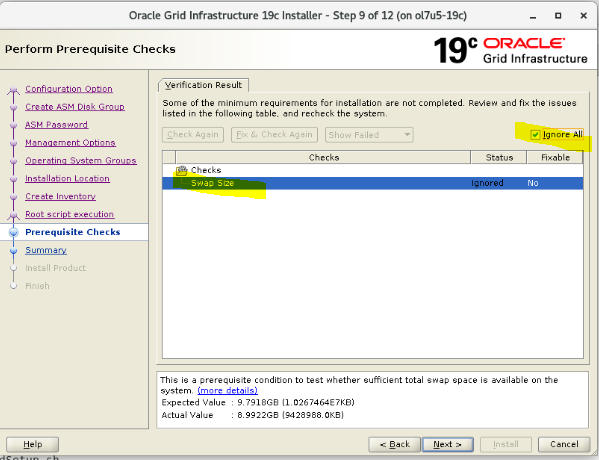
Note : You should set up all the prerequists
Step 11 : Begin the setup process

Step 12 : Just wait until the end.
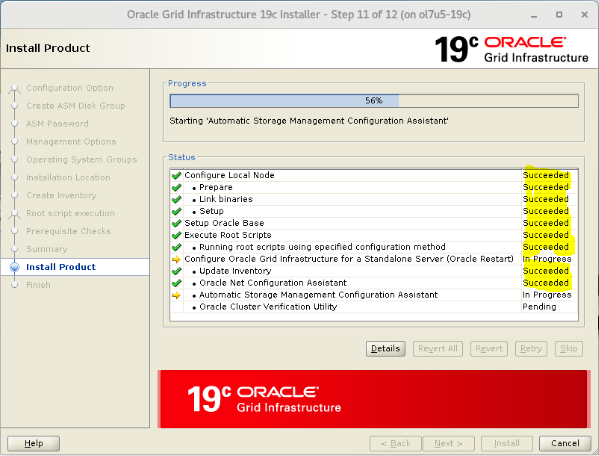
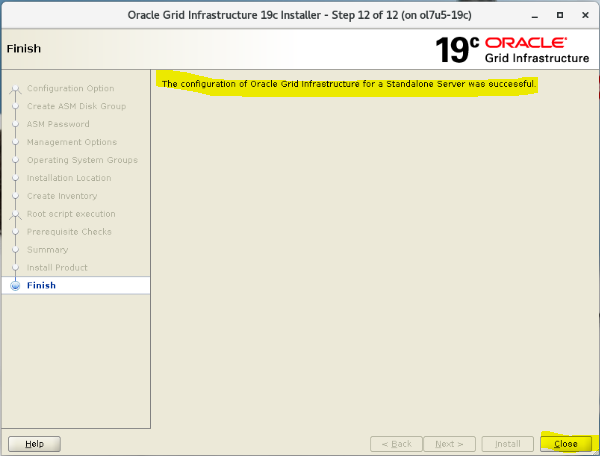
Step 13 : The end of installation :
3. Check the Grid resource
$ crsctl stat res -t
--------------------------------------------------------------------------------
Name           Target  State        Server                   State details
--------------------------------------------------------------------------------
Local Resources
--------------------------------------------------------------------------------
ora.DATA.dg           ONLINE  ONLINE       ol7u5-19c        STABLE
ora.LISTENER.lsnr     ONLINE  ONLINE       ol7u5-19c        STABLE
ora.asm               ONLINE  ONLINE       ol7u5-19c        Started,STABLE
ora.ons               OFFLINE OFFLINE      ol7u5-19c        STABLE
--------------------------------------------------------------------------------
Cluster Resources
--------------------------------------------------------------------------------
ora.cssd
      1        ONLINE  ONLINE       ol7u5-19c                STABLE
ora.diskmon
      1        OFFLINE OFFLINE                               STABLE
ora.evmd
      1        ONLINE  ONLINE       ol7u5-19c                STABLE
--------------------------------------------------------------------------------
[oracle@ol7u5-19c ~]$
Conclusion :
We have set up all steps to set up ASM disks and the installation steps Oracle Grid Infrastructure Standalone 19c3.





Pingback: Create a new ASM DiskGoup on 19c3 | Wadhah DAOUEHI
Pingback: Install Oracle database 19c3 on ASM | Wadhah DAOUEHI