Transportable Tablespaces (TTS) is one of the fastest methods to migrate large amounts of data between Oracle databases, TTS move the physical datafiles while Data Pump transfers only the metadata.
This method significantly reduces migration time because the data itself is not unloaded and reloaded.
In Oracle Database 19c, Transportable Tablespaces can also be used to migrate application data from a legacy Non-CDB database into a Pluggable Database (PDB) hosted in a Container Database (CDB).
Architecture
Source Database
- Database Type: Non-CDB
- Database Name: orcl
Destination Database
- Database Type: CDB
- PDB Name: orclv2
Application tablespaces to transport:
- DATA_TBS
Prerequisites
Before starting the migration, verify the following requirements.
- Source and destination databases must use the same database character set.
- Database block size must be identical.
- Endianness must be compatible.
- The SYSTEM, SYSAUX, UNDO and TEMP tablespaces cannot be transported.
- The destination PDB must already exist and be open.
- Oracle Data Pump must be available.
- The user performing the migration must have the required privileges.
Step 1 – Verify Platform Compatibility
On both databases execute:
SELECT platform_name, endian_format FROM v$transportable_platform ORDER BY platform_name;Note: If both databases have the same endian format, the datafiles can be copied directly.
Step 2 – Verify the Transportable Set
On the Non-CDB database execute:
EXEC DBMS_TTS.TRANSPORT_SET_CHECK(ts_list => 'DATA_TBS', incl_constraints => TRUE);
Note: Verify that no violations exist.
SELECT * FROM TRANSPORT_SET_VIOLATIONS;If this query returns no rows, the tablespaces are transportable.
Step 3 – Put the Tablespaces in READ ONLY Mode
ALTER TABLESPACE DATA_TBS READ ONLY;Verify the status.
SELECT tablespace_name, status FROM dba_tablespaces WHERE tablespace_name = 'DATA_TBS';Expected result:

Step 4 – Create a Data Pump Directory
CREATE DIRECTORY migration AS '/home/oracle/migration';

GRANT READ, WRITE ON DIRECTORY migrationTO system;
Step 5 – Export the Metadata
Export only the metadata associated with the transportable tablespaces.
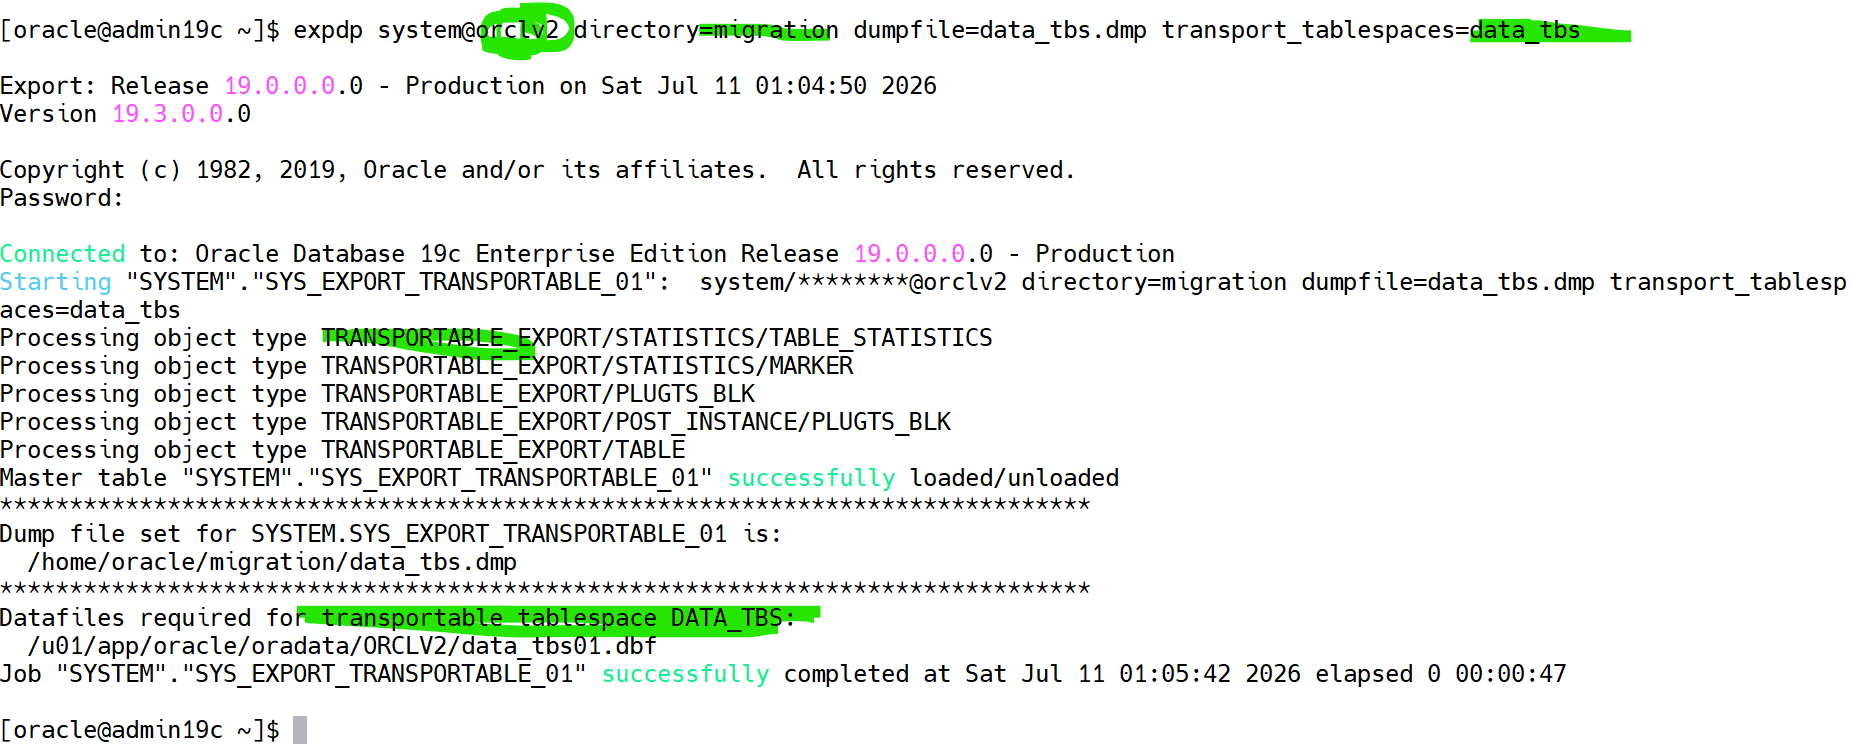
Note: The export completes quickly because only metadata is exported.
Step 6 – Copy the Datafiles
Locate the datafiles.

Example:
/u01/app/oracle/oradata/ORCLV2/data_tbs01.dbfCopy the datafiles to the destination server.
Example: In my case both databases on the same server
cp /u01/app/oracle/oradata/ORCLV2/data_tbs01.dbf /u01/app/oracle/oradata/ORCL/pdb/data_tbs01.dbfStep 7 – Open and create a directory on the Destination PDB
Connect to the Container Database.
sqlplus / as sysdbaOpen the PDB if not.
ALTER PLUGGABLE DATABASE pdb OPEN;
ALTER SESSION SET CONTAINER=pdb;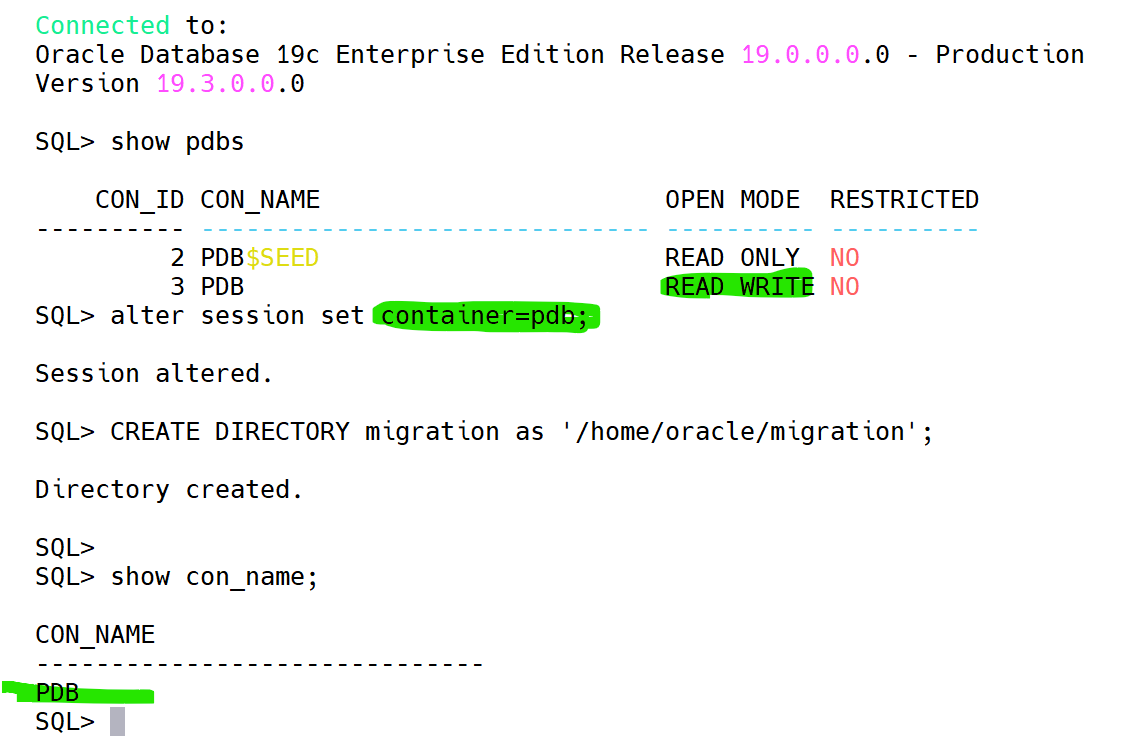
Step 8 – create the schema user
Create a user schema:
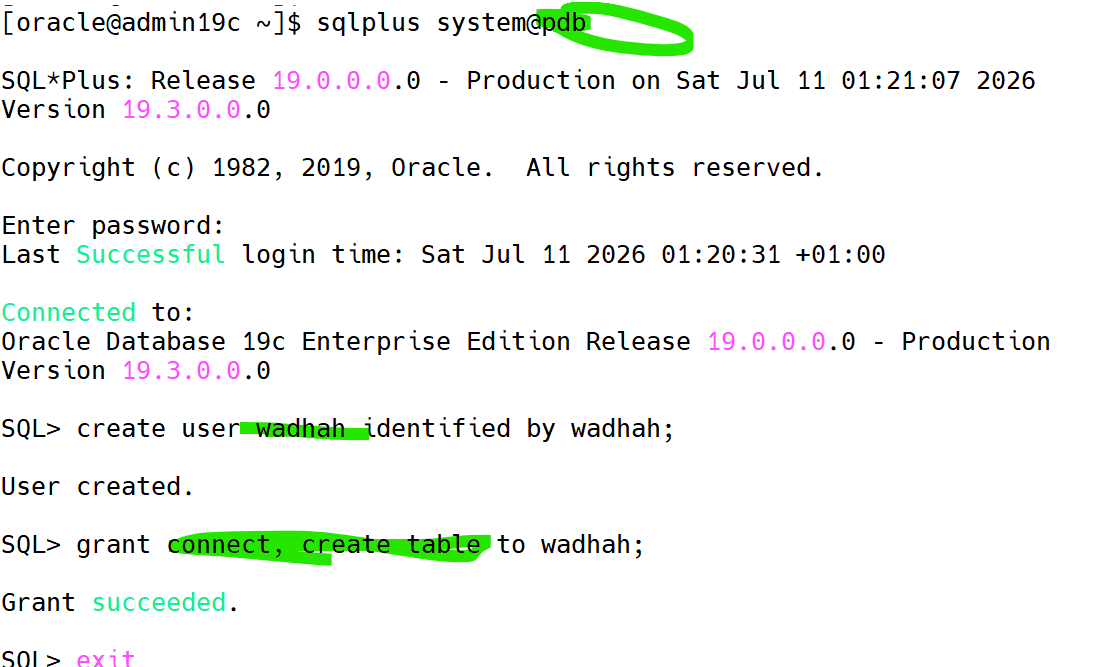
Step 9 – Import the Metadata
Execute the import.
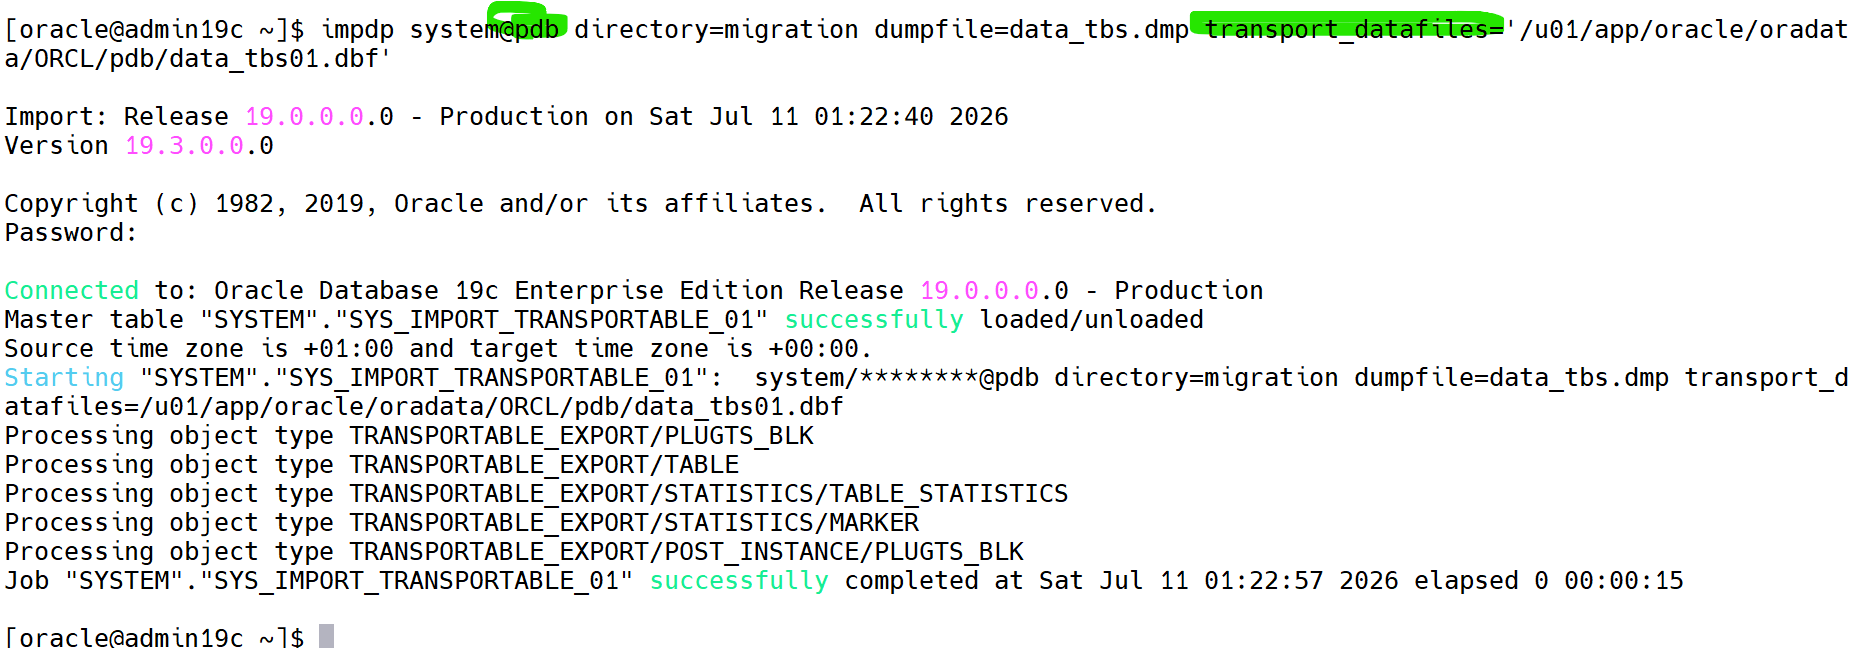
Oracle plugs the transported tablespaces into the destination PDB.
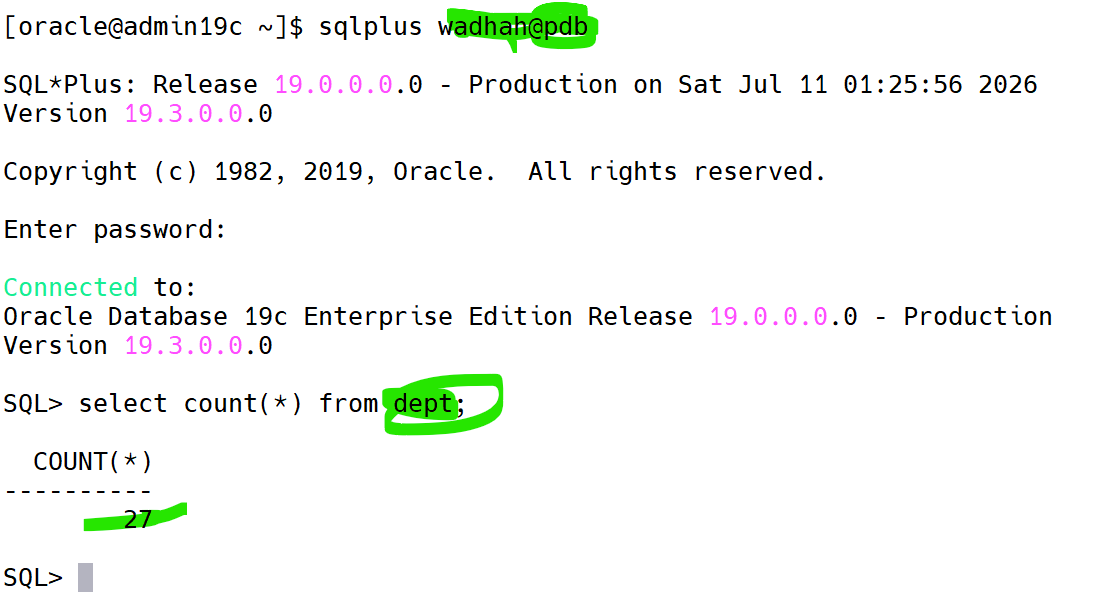
Step 10 – Verify the Migration
Verify the objects.
Best Practices
- Always run
DBMS_TTS.TRANSPORT_SET_CHECKbefore exporting. - Verify endian compatibility before copying datafiles.
- Validate object counts after the import.
- Keep the export log and import log for troubleshooting.
- Perform the migration during a maintenance window for production environments.
Summary
Transportable Tablespaces provide one of the fastest methods for migrating large application datasets from a Non-CDB database to a Pluggable Database. Because only metadata is exported while the datafiles are physically moved, migration time is greatly reduced compared to a conventional Data Pump export/import.
 Google+
 Facebook